Reports are viewable either on the eZeePOS Office site, or directly through the eZeePOS app. This guide will go through how to view the reports on the eZeePOS app.
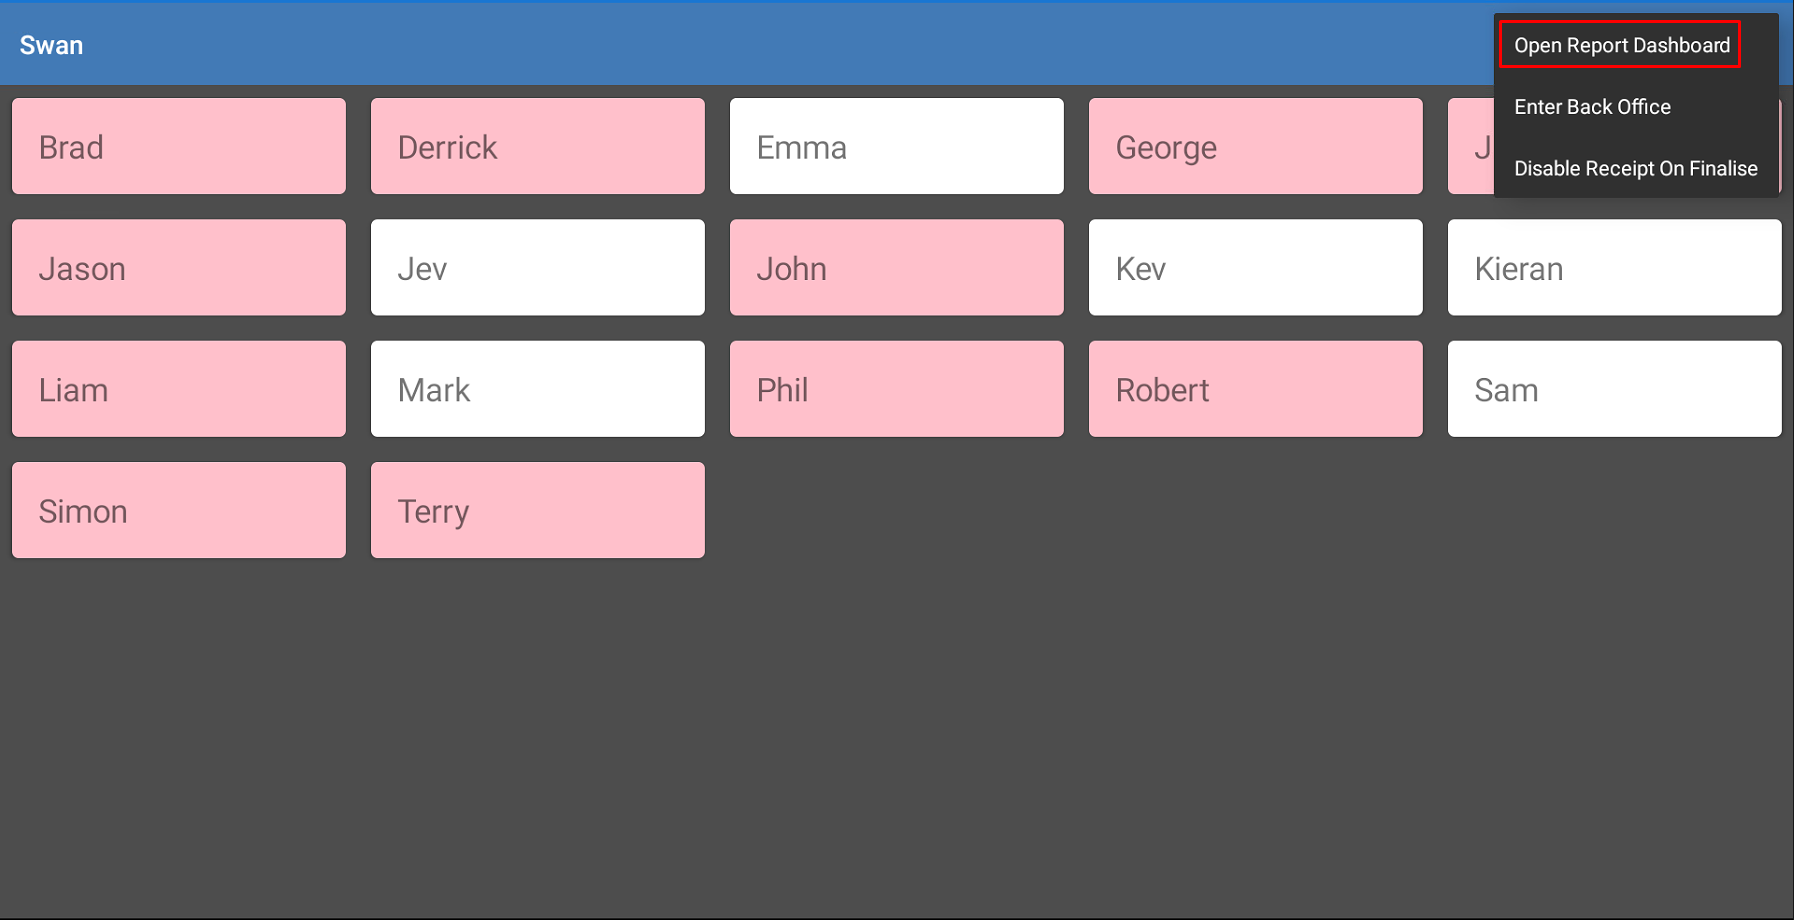
On the login page of the app, at the top-right of the screen you will see 3 stacked dots, press this and you will be given two options, you will want to press the one which says [Open Report Dashboard].
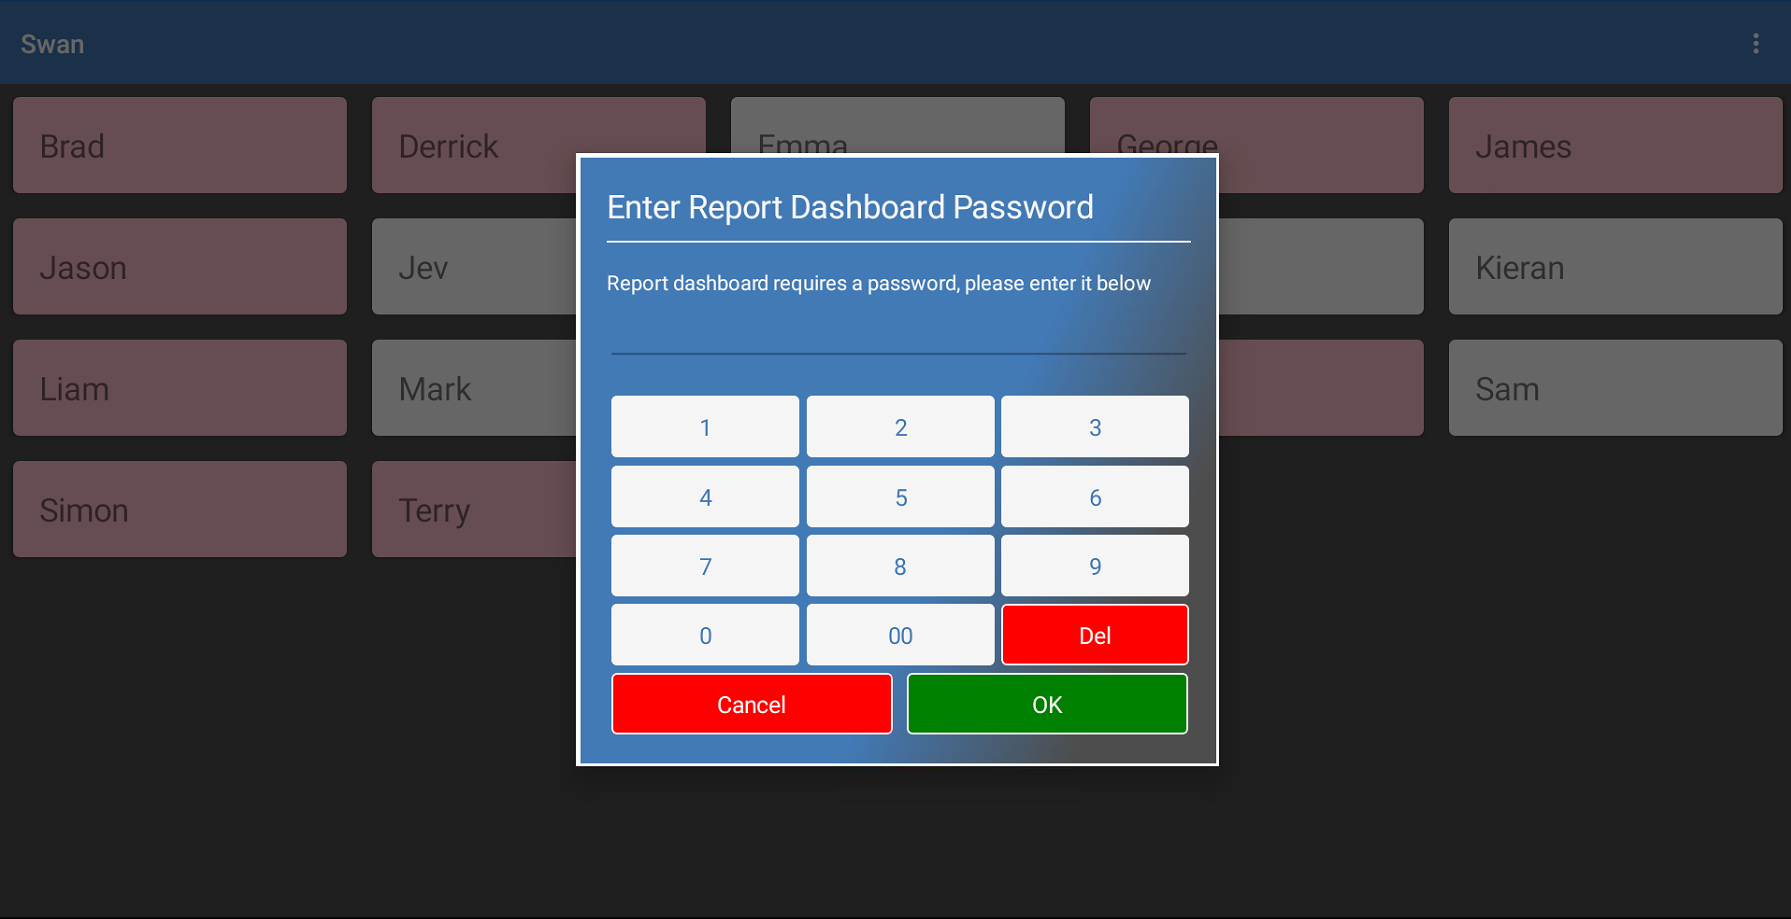
At this point you will be asked for a password, this is the password that you will have set in the Back Office. Once you have entered this press [OK] and you will be taken to the Report Dashboard.
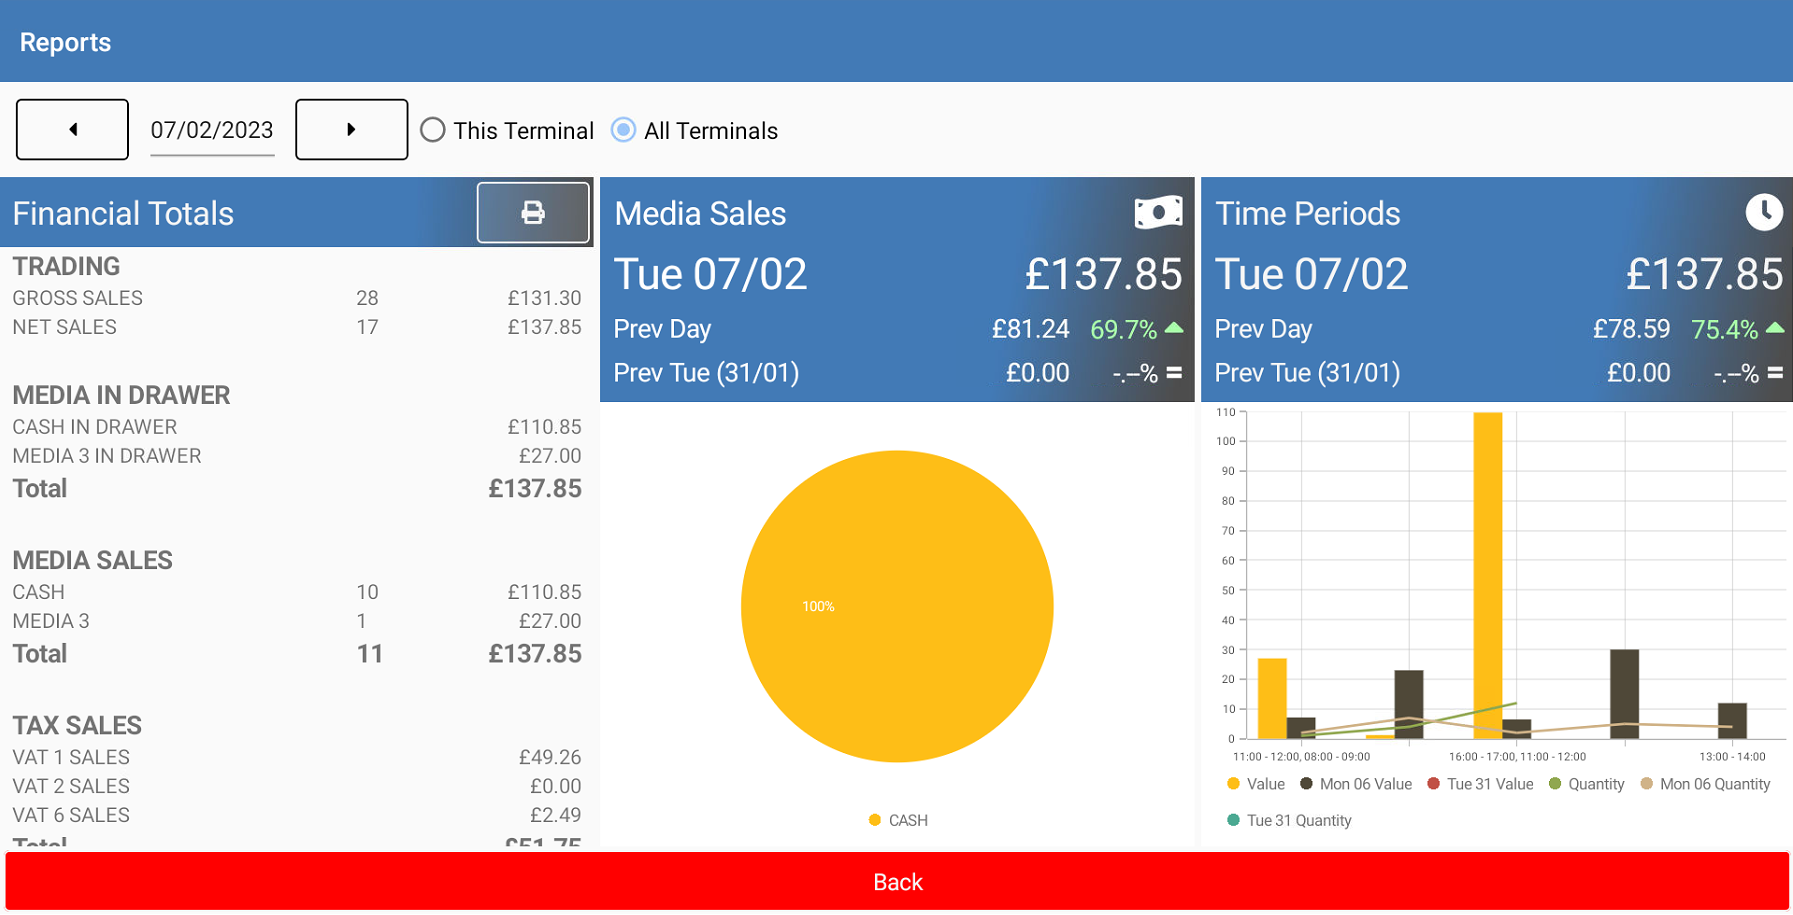
Along the top there is the date, which allows you to either press the left and right arrow keys to navigate the dates or press the date itself for a calendar to appear. This will allow for you to search for a date and select it.
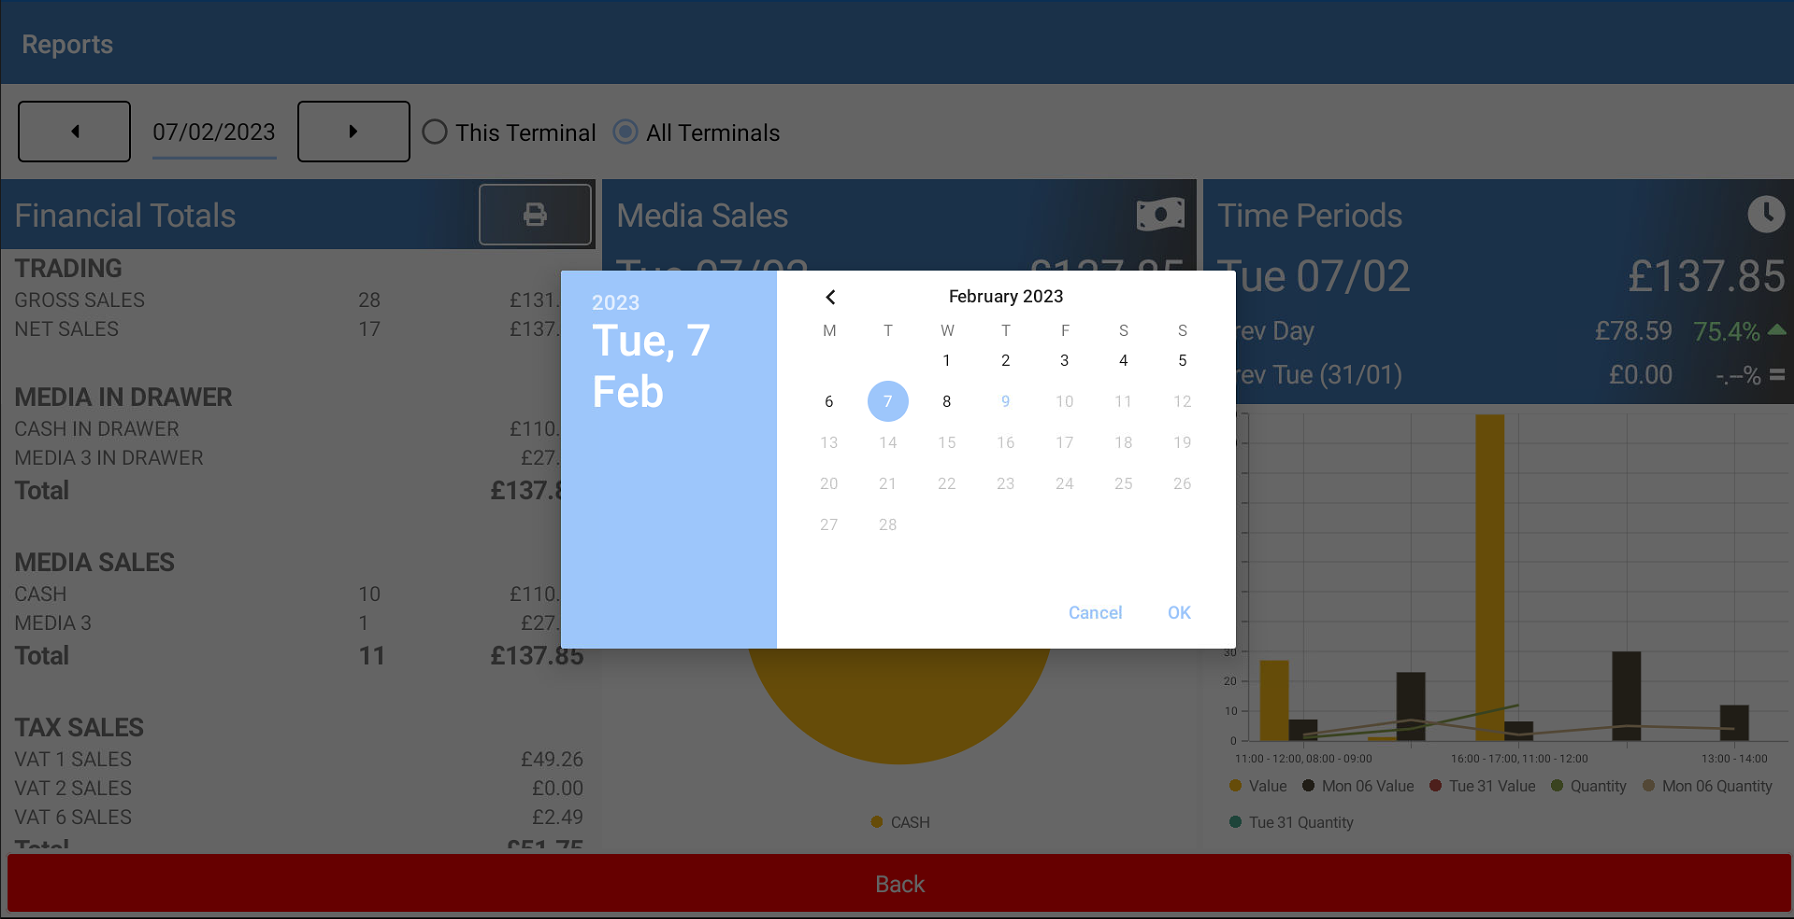
Pressing OK after the date has been selected will then load financial data for this date.
To the right of this is the Terminals section. Here there are two radio buttons: Just this one and All. By default, Just this one will be selected. This means that the financial information shown below will only be for the terminal you are currently on. However, if All is selected, this will show every terminal’s financial information collated into one overall set of totals.

Underneath this we then have our financial information, represented in totals, charts and graphs. The first is the Financial Totals column. If you are on a vertical device, then this will be the only column you can see, however if you are on a horizontal device this will be the first of 3 columns. This section gives you a rundown of your financial totals, and you can swipe up and down to scroll through this column. You can also press [PRINT] and this will print of the financial totals from your receipt printer.
To the right of this we then have a few charts and graphs. On both the vertical and horizontal devices, you can swipe to the left to navigate through these.