In eZeePOS Office there are some settings which can be altered to change how to receipt prints out. This allows for things like printing by group, or to add a receipt message/ logo.
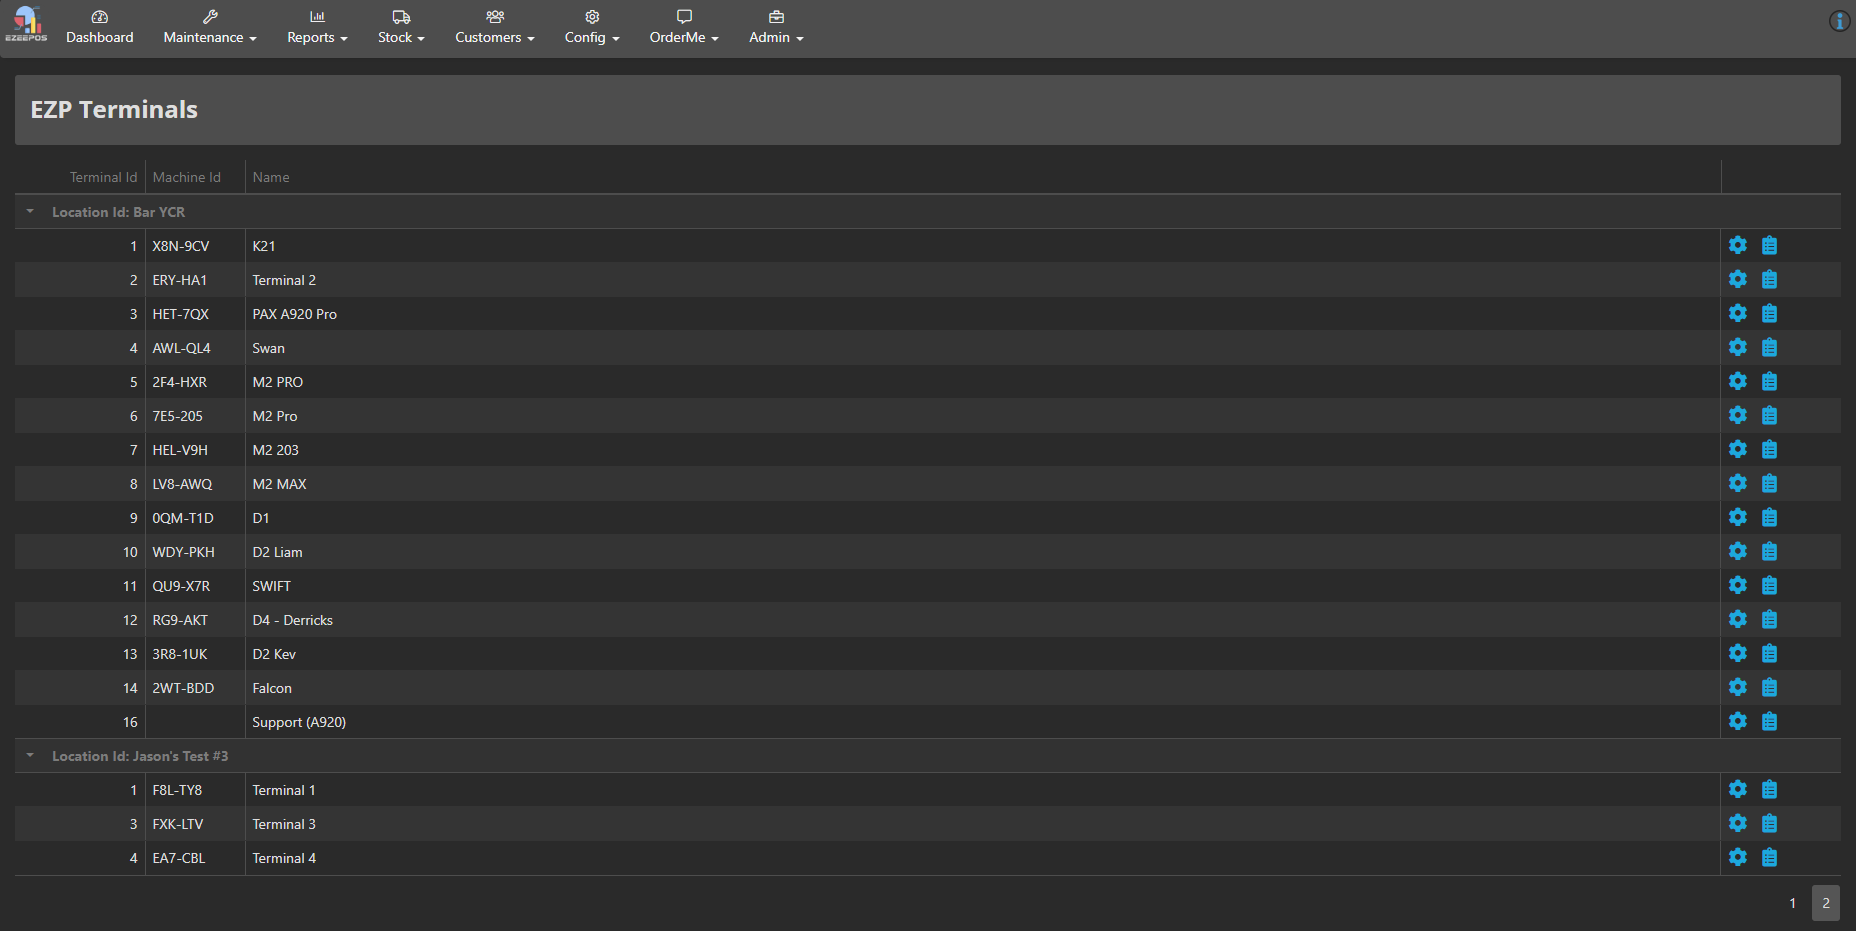
To get to these settings, you will want to navigate to the terminal’s config settings. You can do this by going to Config -> Terminals -> EZP Terminals. On this page, find the terminal you wish to amend the printing options for and then click Settings Cog icon on the right-hand side.
You should now be in the terminal configuration settings. You will want to click the tab which says Receipt Printing.
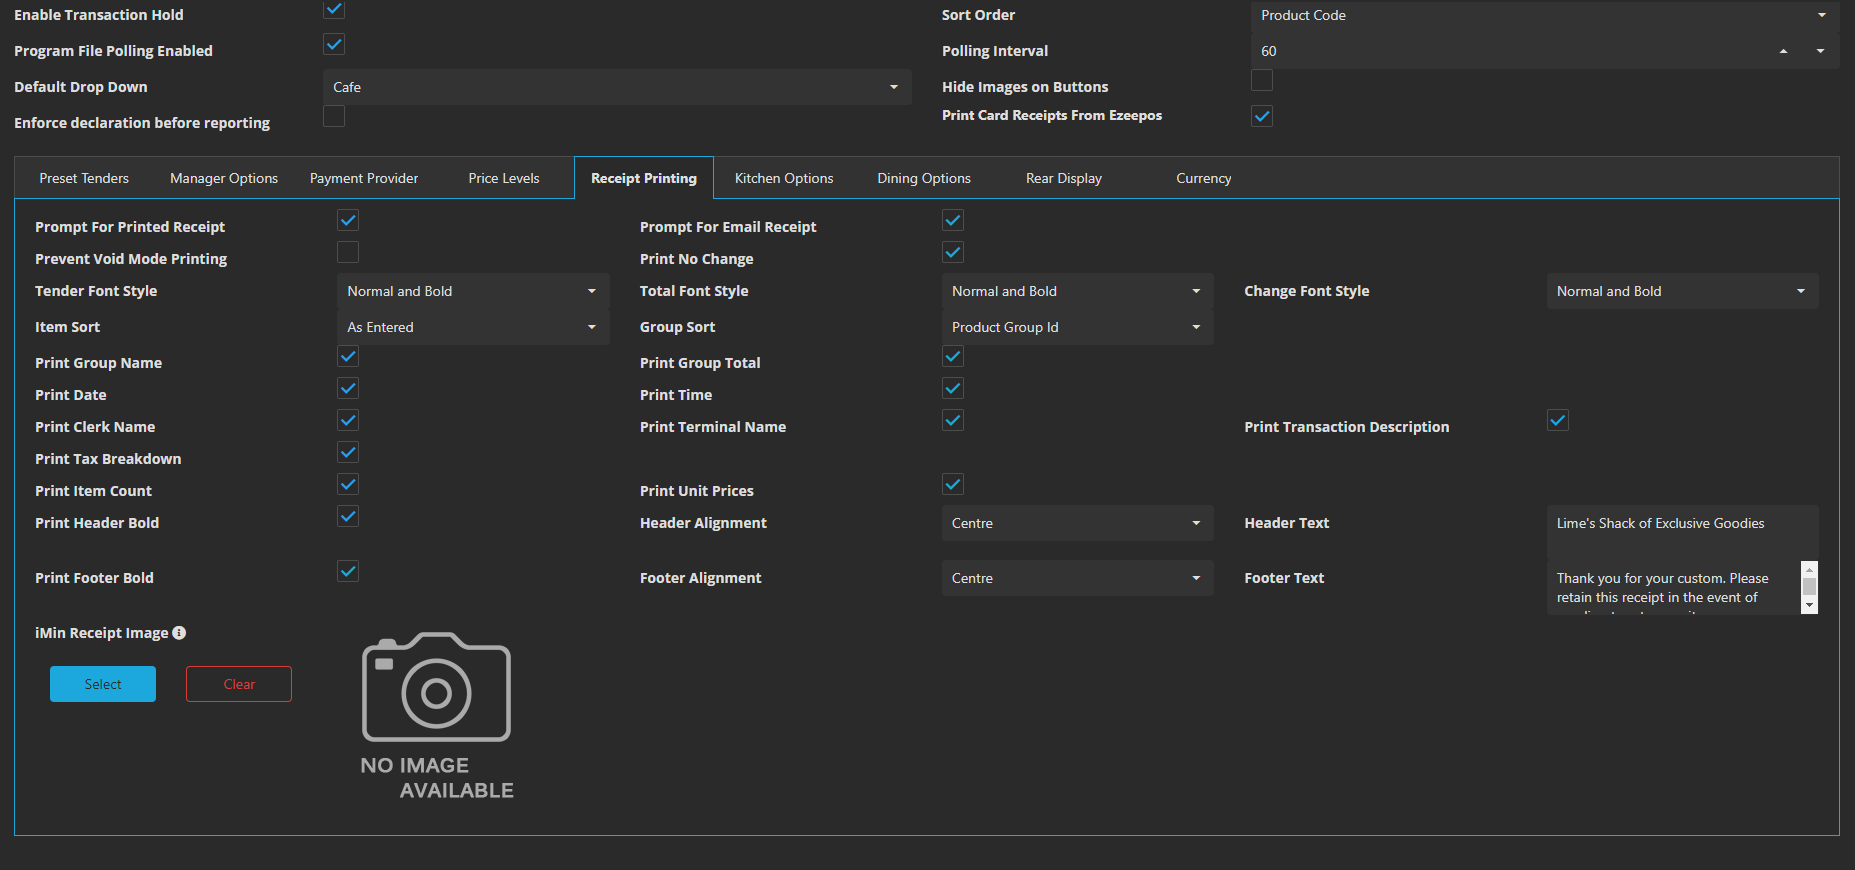
Working from the top down, we have the following options:
– Prompt For Printed Receipt: If ticked, when the receipt is set not to print on eZeePOS, once the transaction is finalised, it will prompt asking if the receipt needs to be printed.
– Prompt For Email Receipt: If ticked, when the transaction is finalised, it will prompt whether the customer would like an email copy of the receipt. If Yes is pressed, the staff member can enter the customer’s email address.
– Include Card Transaction Details: If ticked, when using an integrated card machine, it will print the card transaction details
– Prevent Void Mode Printing: If ticked, when a void mode transaction is finalized, it will not print out a receipt.
– Print No Change: If ticked, when a transaction is finalised and no change is required to be given to the customer, this will be printed on the receipt.
– Tender / Total / Change Font Style: This determines the font style for the Tender, Total, and Change lines. This can be set as either: Normal, Normal Bold, Double Height, and Double Height and Bold.
– Item Sort: This will determine how items will be sorted on the receipt, the options available are: Order As Entered, Order By Description, or Order By Product Code.
– Group Sort: This will determine if the receipt will be ordered by groups. The options available for this are: Order By Group ID or Order By Group Description. Setting this will separate the receipt items into different groups rather than one big list of items.
– Print Group Name: If ticked, and the receipt is set to Group Sort, this will print the group name.
– Print Group Total: If ticked, and the receipt is set to Group Sort, the overall total of the group will print on the receipt.
– Print Date: If ticked, the date will print on the top of the receipt.
– Print Time: If ticked, the time will print on the top of the receipt.
– Print Clerk Name: If ticked, the clerk name will print on the top of the receipt.
– Print Terminal Name: If ticked, will print the terminal name on top of the receipt.
– Print Transaction Description: If ticked, this will print the transaction description on the receipt.
– Print Tax Breakdown: If ticked, at the bottom of the receipt a tax breakdown will be printed out.
– Print Item Count: If ticked, the number of items sold will print out on the receipt.
– Print Unit Prices: If ticked, the unit prices will print out on the receipt.
– Print Header Bold: If a header message has been entered and this option is ticked, the header message will print in bold.
– Header Alignment: This is the alignment of the header message. This can be set to Center, Left, or Right.
– Header Text: This is the message which will appear on the header of the receipt. You can use the text field here to enter the message you wish to have.
– Print Footer Bold: If a footer message has been entered and this option is ticked, the footer message will print in bold.
– Footer Alignment: This is the alignment of the footer message. This can be set to Center, Left, or Right.
– Footer Text: This is the message which will appear on the footer of the receipt.
– iMin Receipt Image: If you are using an iMin device with an in-built printer, this option can be used to select a graphic logo which will print on top of the receipt. Pressing the Select button will open the eZeePOS image library which will allow you to select an image. If you need more information on how to add an image to the image library, please refer to the following guide: Adding An Image To The Image Library In eZeePOS Office
Kitchen Ticket Options
To change your kitchen printing options, click the tab which says Kitchen Options
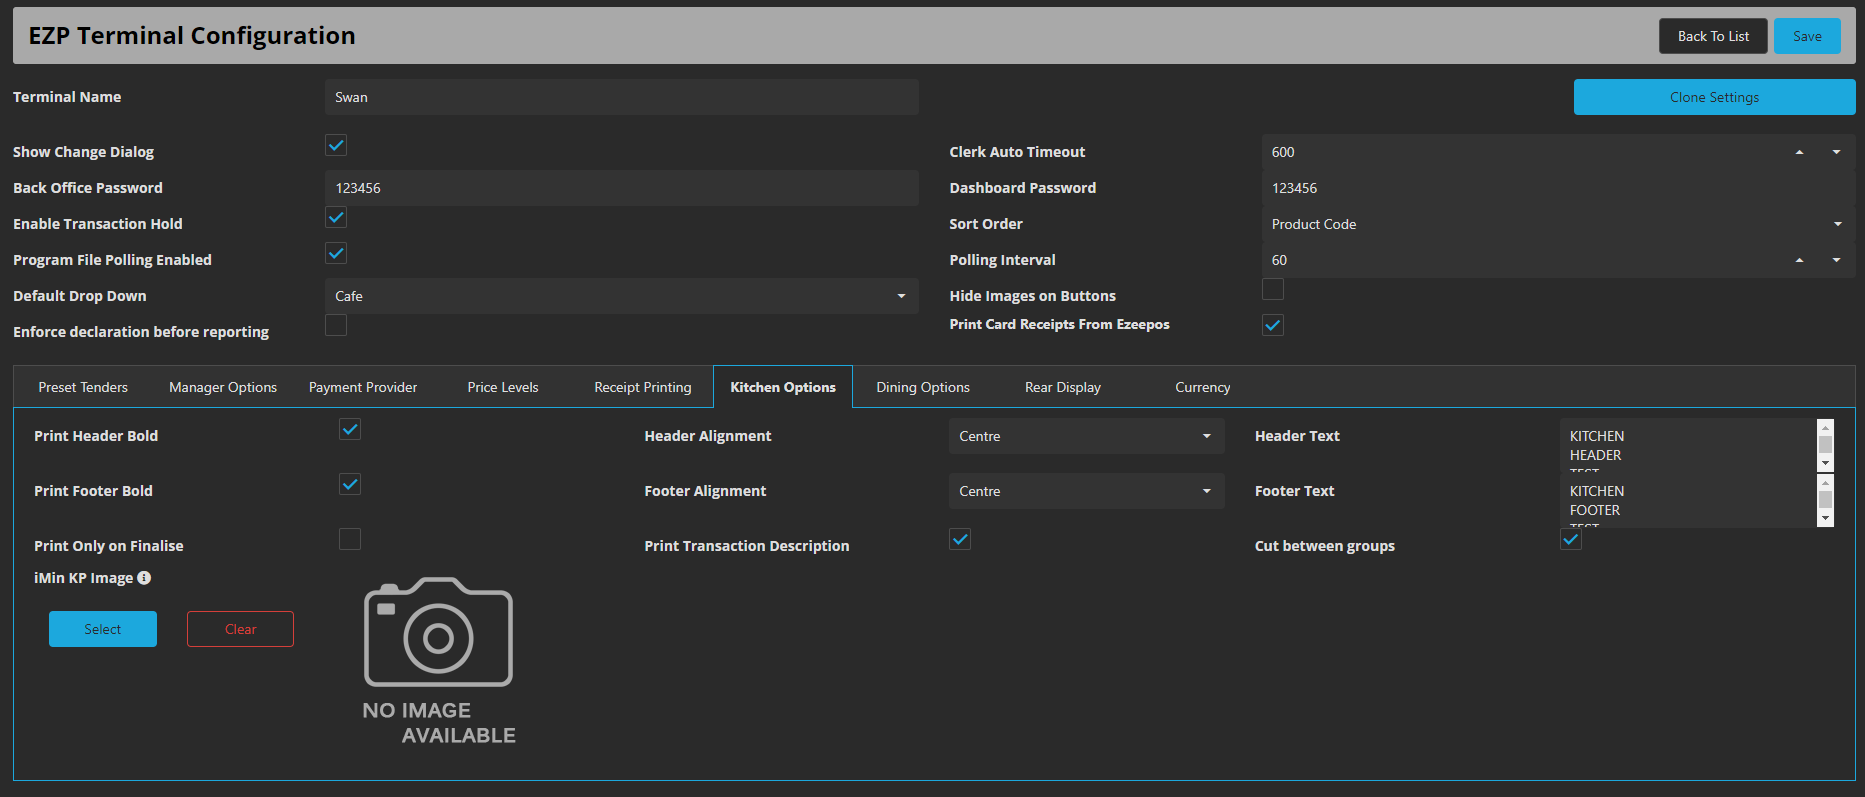
You will have the below options:
– Print Header Bold: If a header message has been entered and this option is ticked, the header message will print in bold.
– Header Alignment: This is the alignment of the header message. This can be set to Center, Left, or Right.
– Header Text: This is the message which will appear on the header of the kitchen ticket. You can use the text field here to enter the message you wish to have.
– Print Footer Bold: If a footer message has been entered and this option is ticked, the footer message will print in bold.
– Footer Alignment: This is the alignment of the footer message. This can be set to Center, Left, or Right.
– Footer Text: This is the message which will appear on the footer of the kitchen ticket.
– Print Only on Finalise: If ticked, the kitchen tickets will only print when the transaction is finalised.
– Print Transaction Description: If ticked, the transaction description name will print on the kitchen ticket.
– Cut Between Groups: If kitchen print groups have been set and this option is ticked, as each group will be cut as separate tickets.
– iMin KP Image: If you are using an iMin device with an in-built printer, this option can be used to select a graphic logo which will print on top of the kitchen ticket. Pressing the Select button will open the eZeePOS image library which will allow you to select an image.
Once you have set your printing options, ensure to press Save at the top-right of the page. You will need to refresh your terminal data on eZeePOS after this for the changes to take effect.