When first setting up your terminal on eZeePOS Office, you will first want to set how you want to the terminal(s) to work. This includes things like enabling the Store / Hold feature, or whether program will be polled automatically to the terminal.
To do this, you will first want to navigate to Config -> Terminals -> EZP Terminals
On this screen you should see your list of terminals. To get your terminal settings, find the terminal you wish to configure and then click the little Cog icon on the right-hand side.
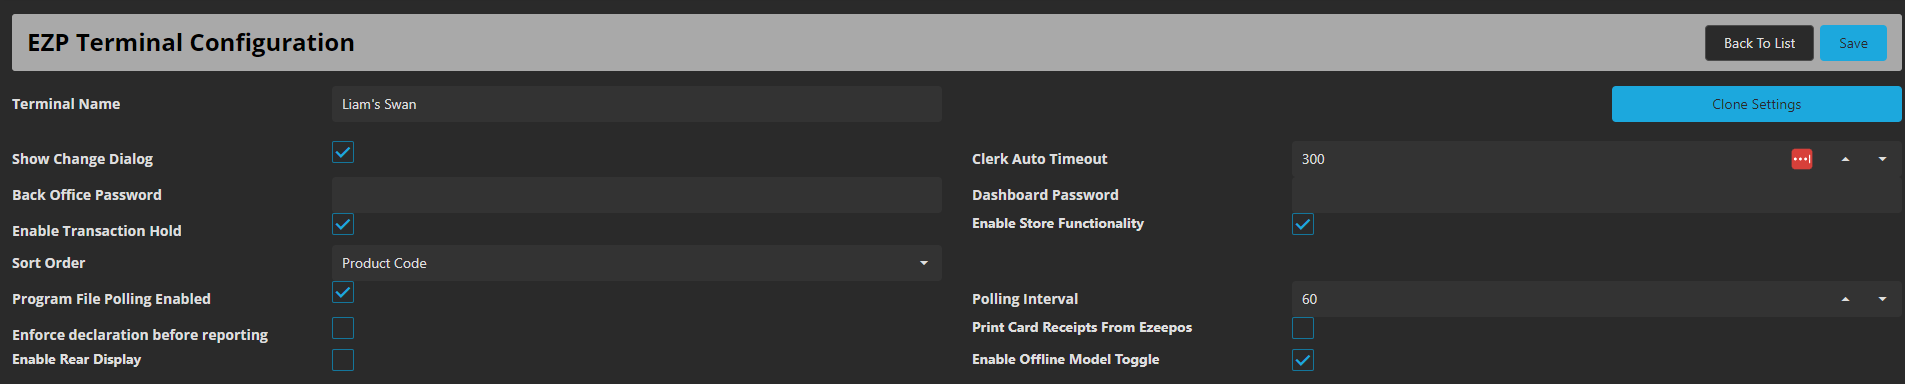
You should now see a list of settings for the terminal you selected, working from the top down, we have the following:
Terminal Name: This is used to identify the terminal. This could be the terminal number, the model / name of the terminal or where the terminal is.
Show Change Dialog: If ticked, when the transaction is finalised with a Cash tender, this will show a window with the amount of change due for the sale.
Clerk Auto Timeout: This is, in seconds, how long it takes before the clerk will automatically be signed out.
Back Office Password: This allows for a password to be set for the Back Office within the eZeePOS app. If left blank, it will not prompt for a password.
Dashboard Password: This allows for a password to be set for the Report Dashboard within the eZeePOS app. If left blank, it will not prompt for a password.
Enable Transaction Hold: If ticked, this will allow for a clerk to use the Hold key, which allows for a transaction to be held and be re-opened at a later time.
Enable Store Functionality: If ticked, this will allow for Store functionality. This allows for a transaction to be stored and given a description, where in which it can be re-opened later, more items added, stored again and then finally completed.
Sort Order: This is how the products will be sorted on the screen, and also within their respective groups.
Program File Polling Enabled: If ticked, the program will be automatically polled to the eZeePOS, the time it does this depending on what is set for the Polling Interval.
Polling Interval: If Program File Polling is enabled, this is the time in minutes in between each program poll.
Enable Declaration Before Reporting: If ticked, when entering the Report Dashboard, you will first need to enter your float.
Print Card Receipt From eZeePOS: If ticked, and a card payment is made, it will print the Merchant and Customer Receipt (if set to print) from the printer selected within eZeePOS.
Enable Rear Display: If a device has a larger rear display (iMin Swan, D4) this can be enabled to allow for functionality of the rear display. It is recommended that if the device does not have a display, or does not have the rear display connected, that this option is left unticked.
Enable Office Model Toggle: This option is used for environments where the mobile data signal / internet connection can be quite intermittent or unreliable. As the connection between the terminal and the cloud is bad, it may take longer for things to happen. This option enables a button which when pressed will put the device in offline mode for 15 mins, meaning transactions will be stored locally on the terminal until the terminal reconnects with the Cloud at which point the transactions will then upload.