Preset Tender keys can be added to the payment screen within eZeePOS to allow a transaction to be finalized quickly, without having to manually enter an amount. This guide will go through how to set these up.
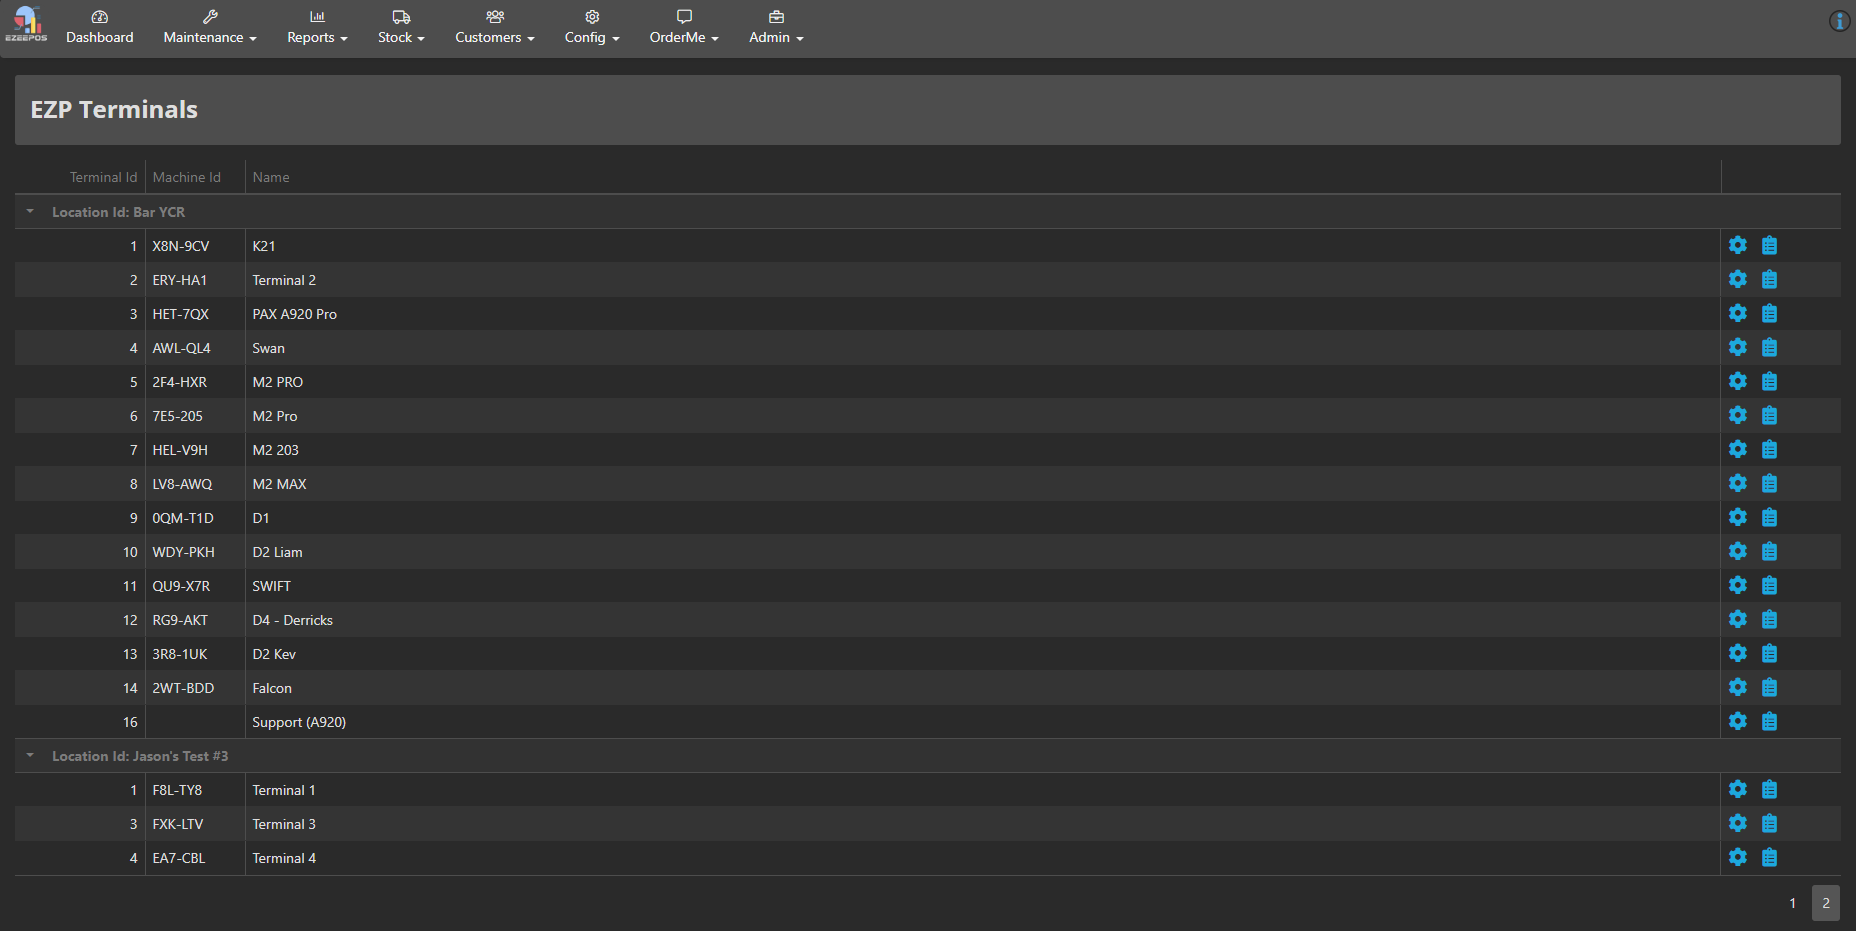
The main setup of the preset tender keys is done through eZeePOS Office. You will first want to navigate to Config -> Terminals -> EZP Terminals, this will take you to your list of eZeePOS terminals. Find the terminal you wish to add the preset tender keys to and then click Settings Cog Icon on the right-hand side.
This will take you to that terminal configuration screen.
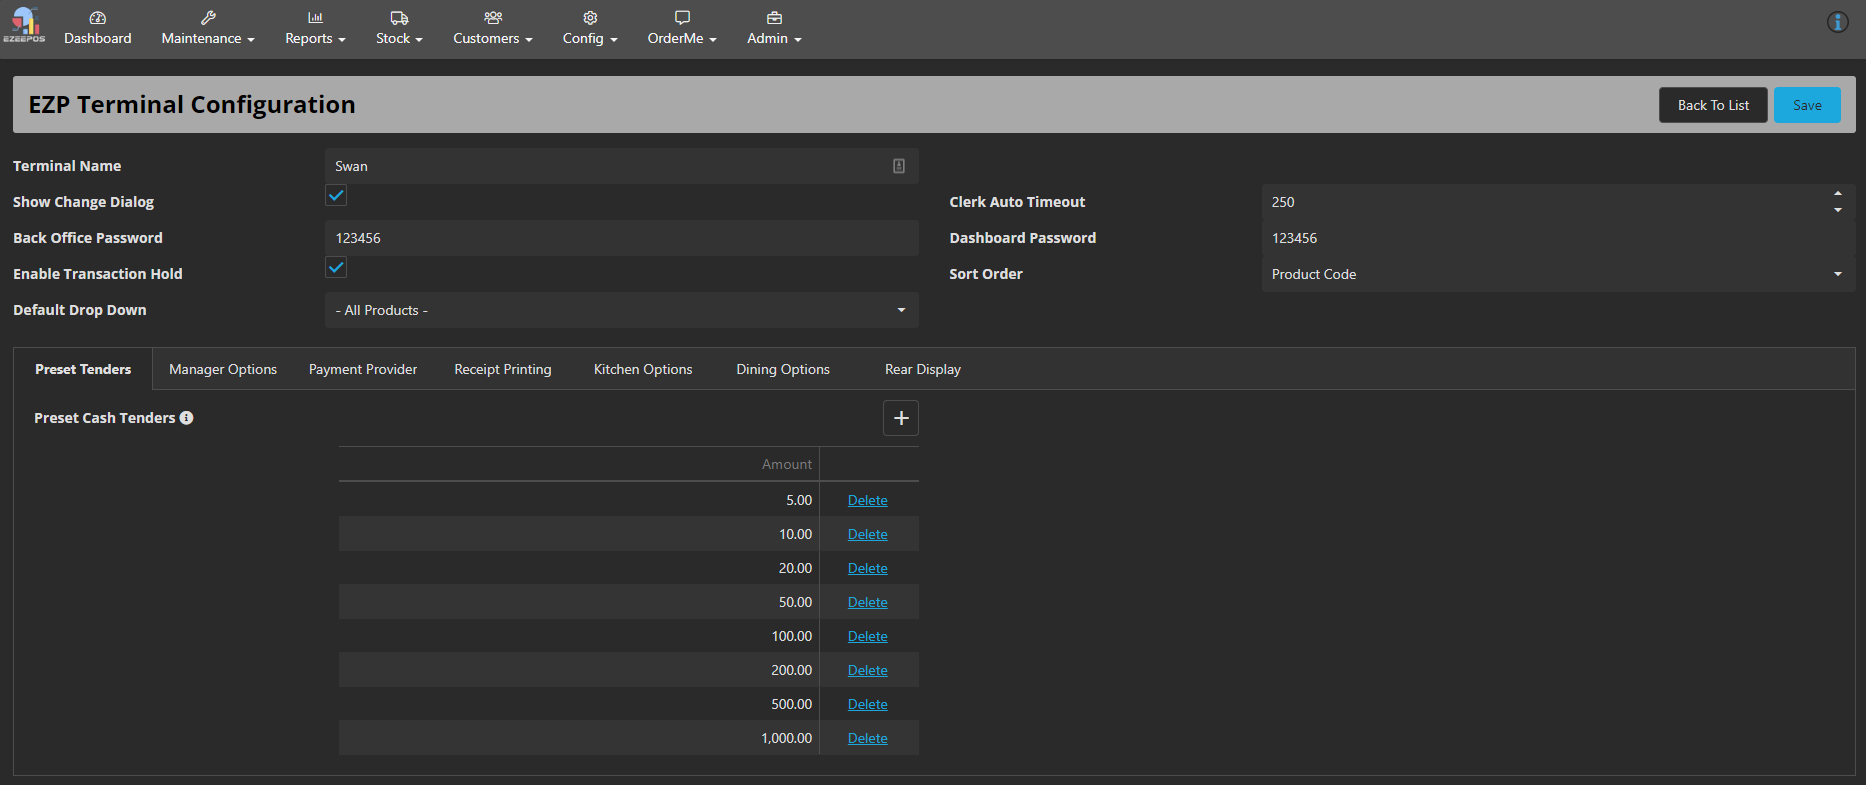
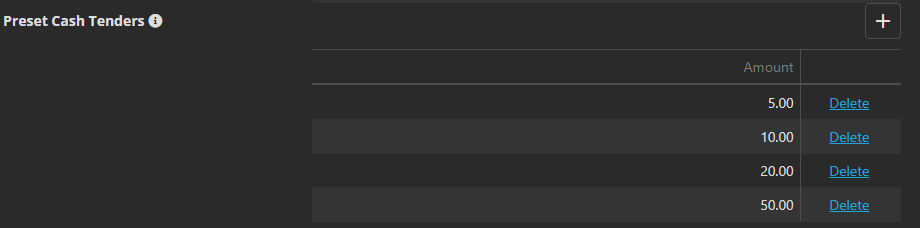
The first tab on the bottom is the section for Preset Cash Tenders. To add a quick tender key, press the little + icon on the right. This will add a line to the table underneath. You will now be able to enter a tender amount, for example, 5, which when pressed will tender for £5. Once you have entered an amount, press Enter on your keyboard and this will add this tender key to the table. You can keep pressing + to add more tenders, the normal ones being £5, £10, £20, and £50. It is recommended that you have no more than 5 tender keys. Once you have added the tenders you require, press Save at the top-right of the screen.
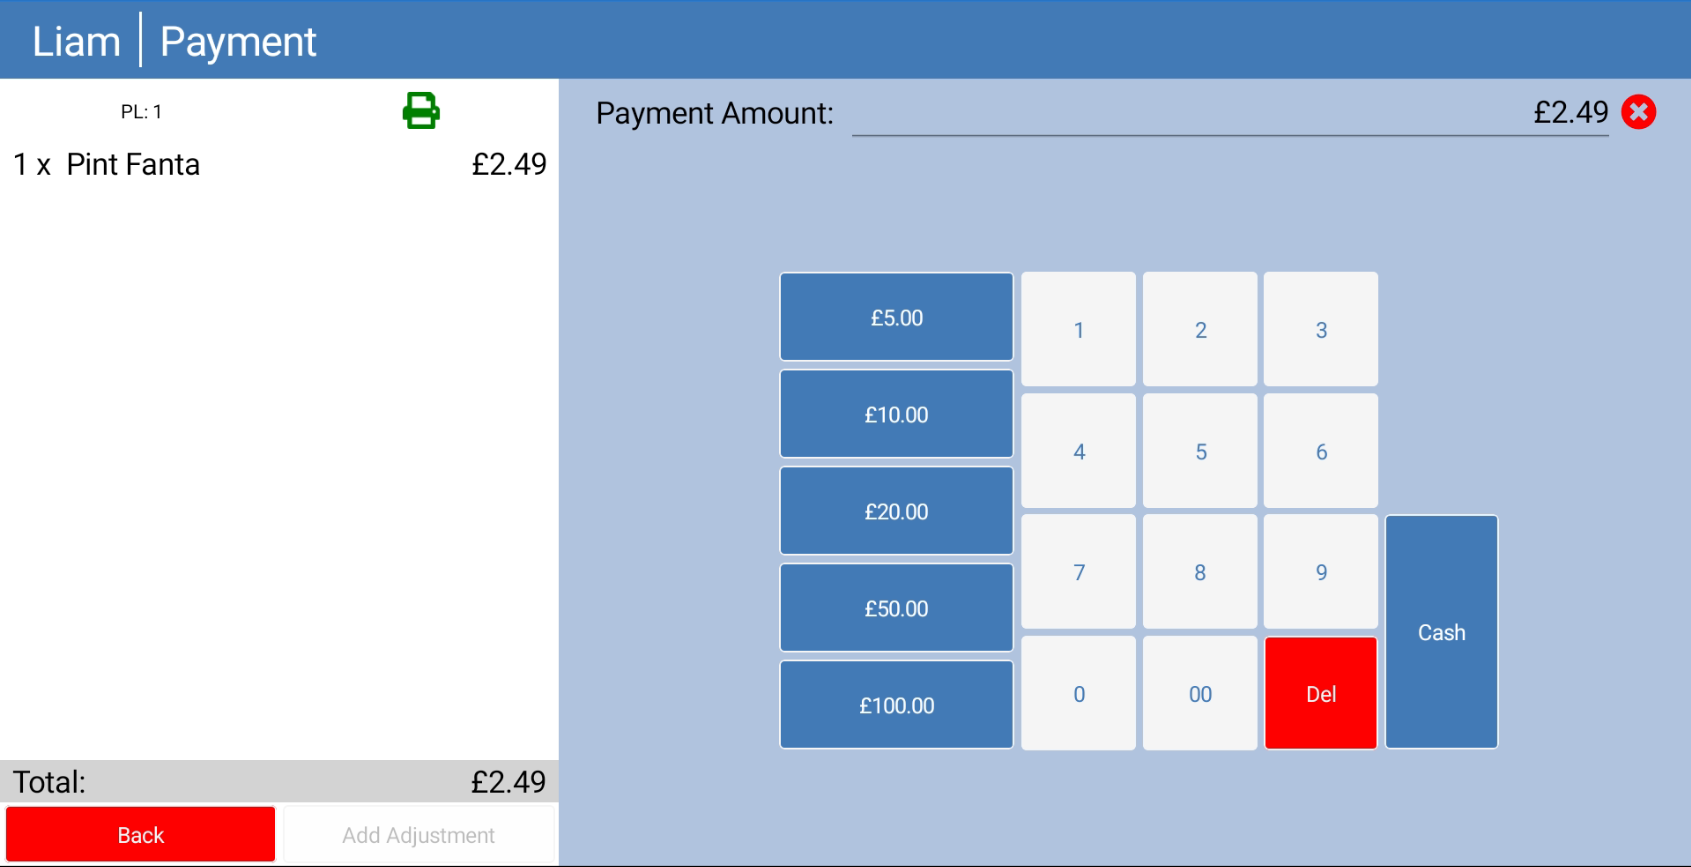
To get your tender keys to show in eZeePOS, you will first need to refresh your terminal data. Once you have done this, start a sale and sell some items. Once you get to the payment screen, you should then be able to see your quick tender keys. Pressing one of these will tender that amount.