Before you start making your products, it may be useful to create product groups so that you can have different groups for different types of products. This will also determine where the products will show on eZeePOS as well, as the screens are ordered by the product group. It will also allow you to view group totals on financial reports. You will also need to ensure that some Group Classifications are setup so that you can link the groups to them.
To begin creating groups, along the top-bar of eZeePOS Cloud Back Office, go to Maintenance -> Product Groups.
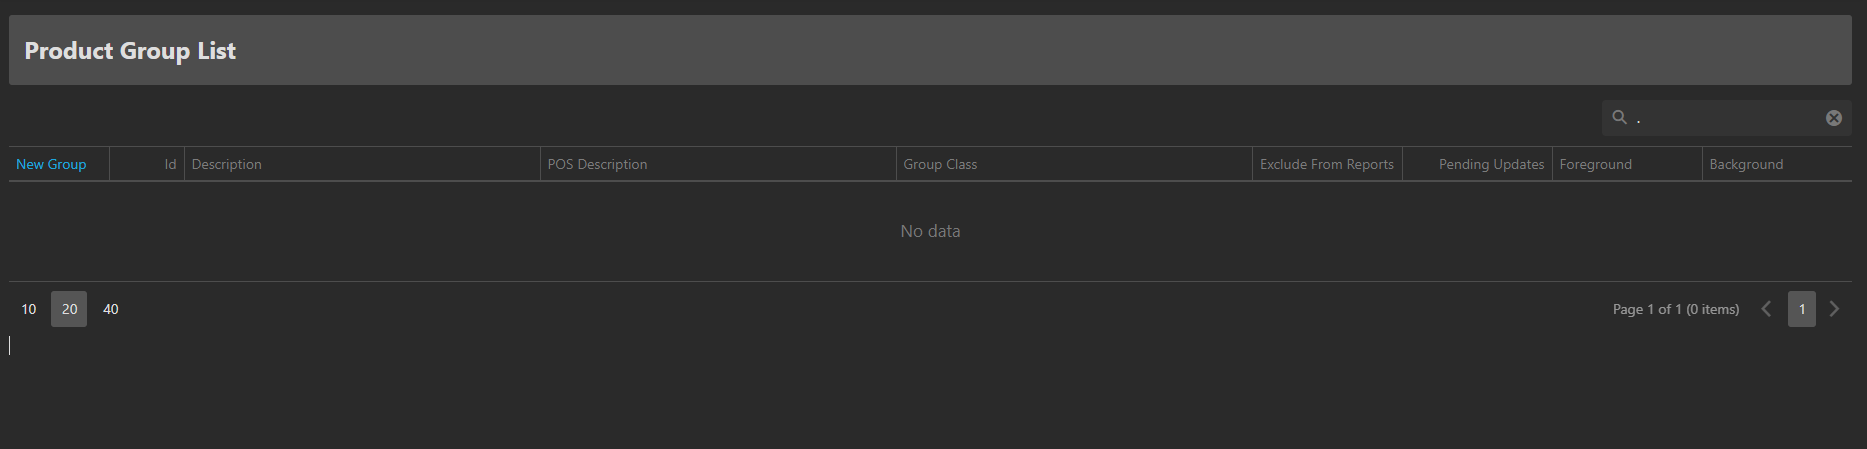
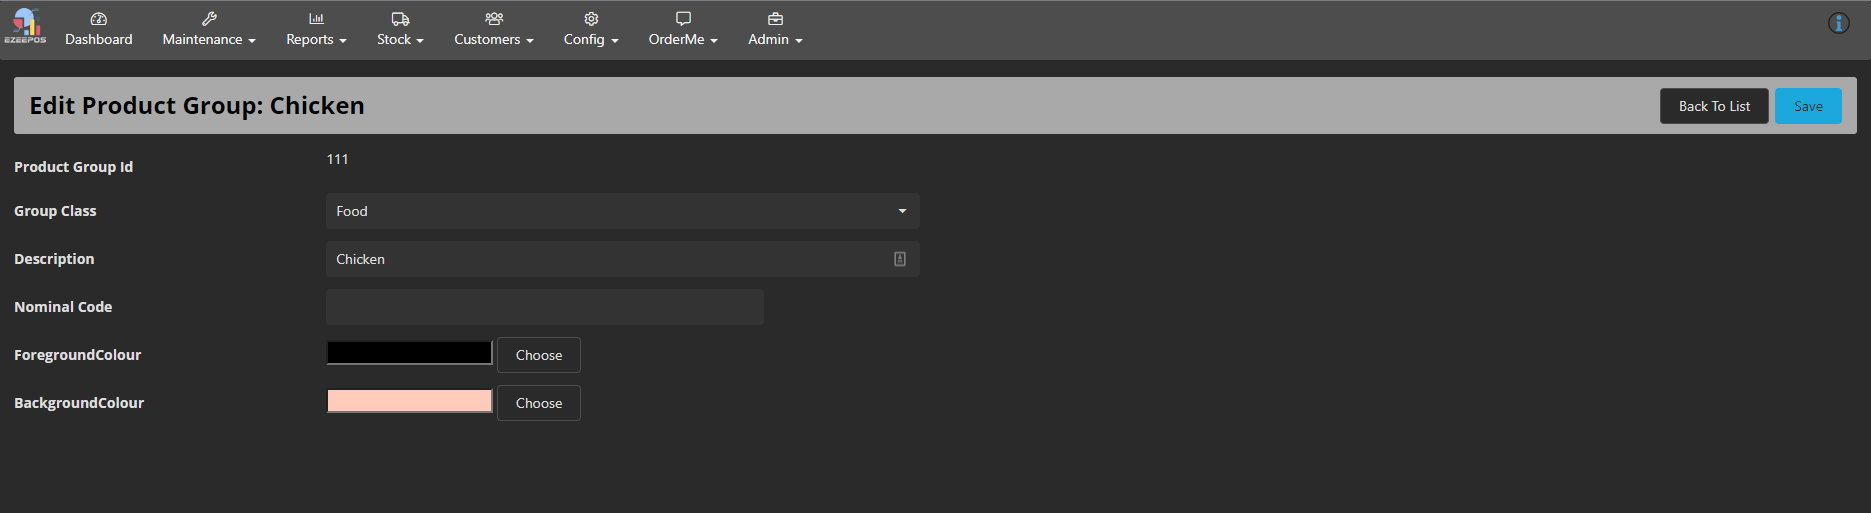
To create a new group, click the New Group button at the top-left of the page. This will take you to the Product Group Creation page, where you will have the following:
Product Group Id: This is the group identifier, this can be changed to a number of your choosing, but will at first be populated with the next available Group Id number
Group Class: This allows you to link a group classification to the group.
Description: This is the description of the group.
Nominal Code: The nominal code is used for Sage reporting. You will need to get this from Sage directly.
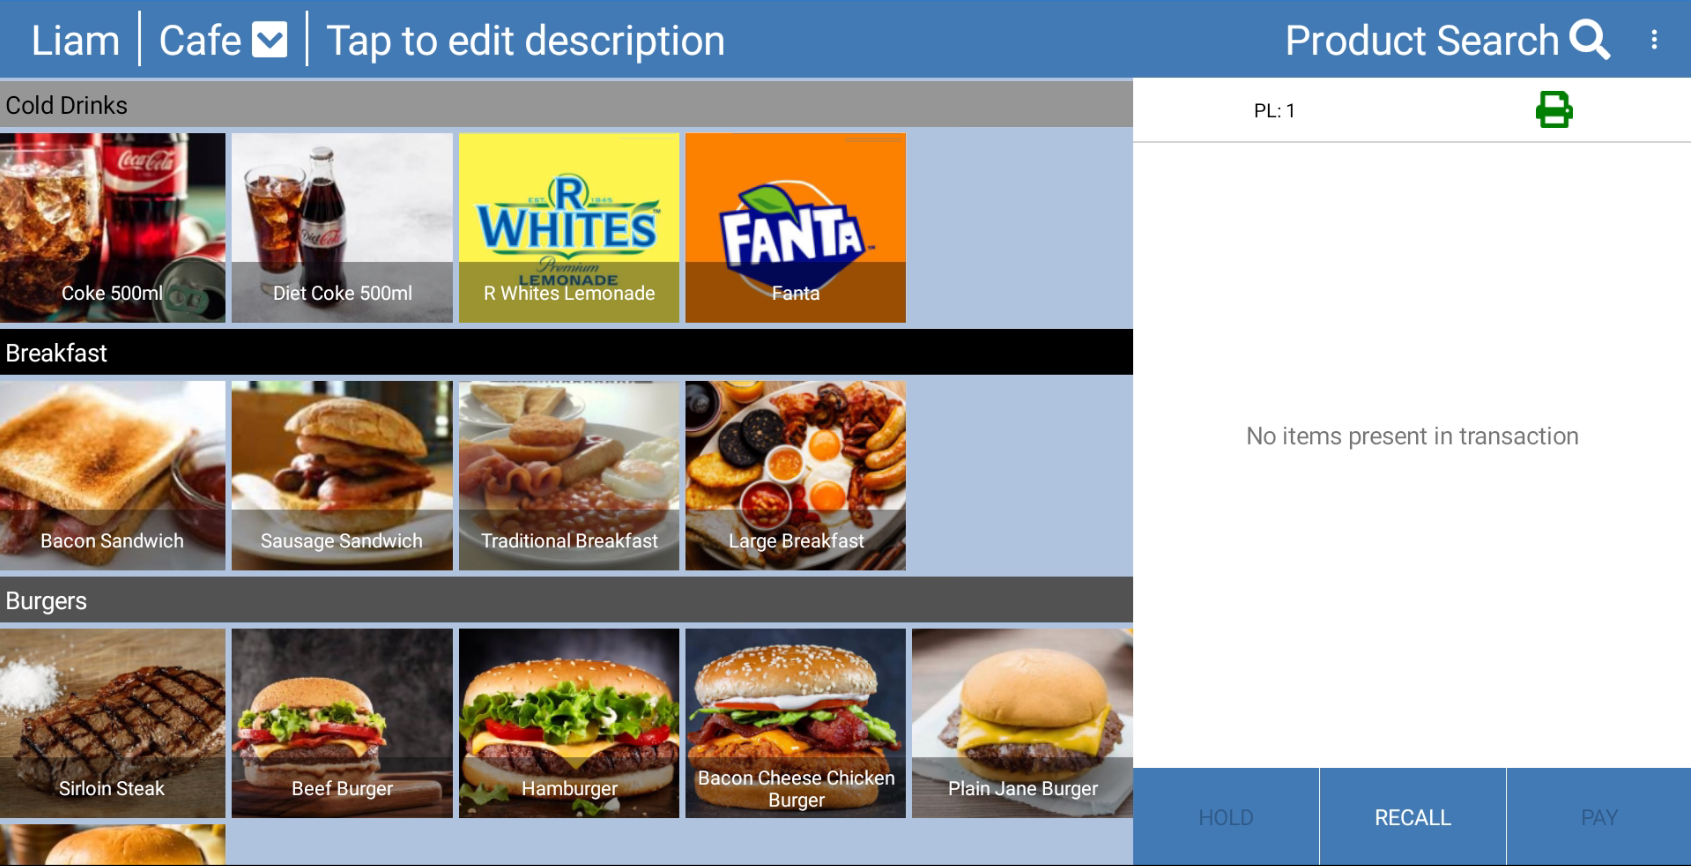
Foreground Colour: eZeePOS filters and displays the products via their groups, this is represented by a banner with a colour and the group name. The foreground colour is the colour of the text that appears on the banner.
Background Colour: Similar to the above, this is the background colour of the banner line.
Once you have entered in the required fields, click Save and you should now see this new group on the Product Group List screen.
If we now look on eZeePOS, we can see these products in their respective groups once we have refreshed the terminal data: