There may be some products where when sold, extra options like condiments or amendments may be required. With eZeePOS, you can setup Product and/or Memo Lists so that when a product is sold, these options appear in a new window. This guide will go through how to set these up within eZeePOS Office.
Product Lists
Product Lists can be used for scenarios where extra items can be added to a product, for example, a burger, as a condiment. When asking for this product, the customer may request some extra toppings on the burger. By setting up a product list, when the product is sold, it will open up a new window with a list of the products that are in the product list, or in this specific scenario, the extra toppings available for the burger.
To create a Product List, in eZeePOS Office, you will want to navigate to Maintenance and then Product Lists, where you will be taken to the below page:

On this page, click the New List button at the top left of the screen. This will take you the New Product List setup page:
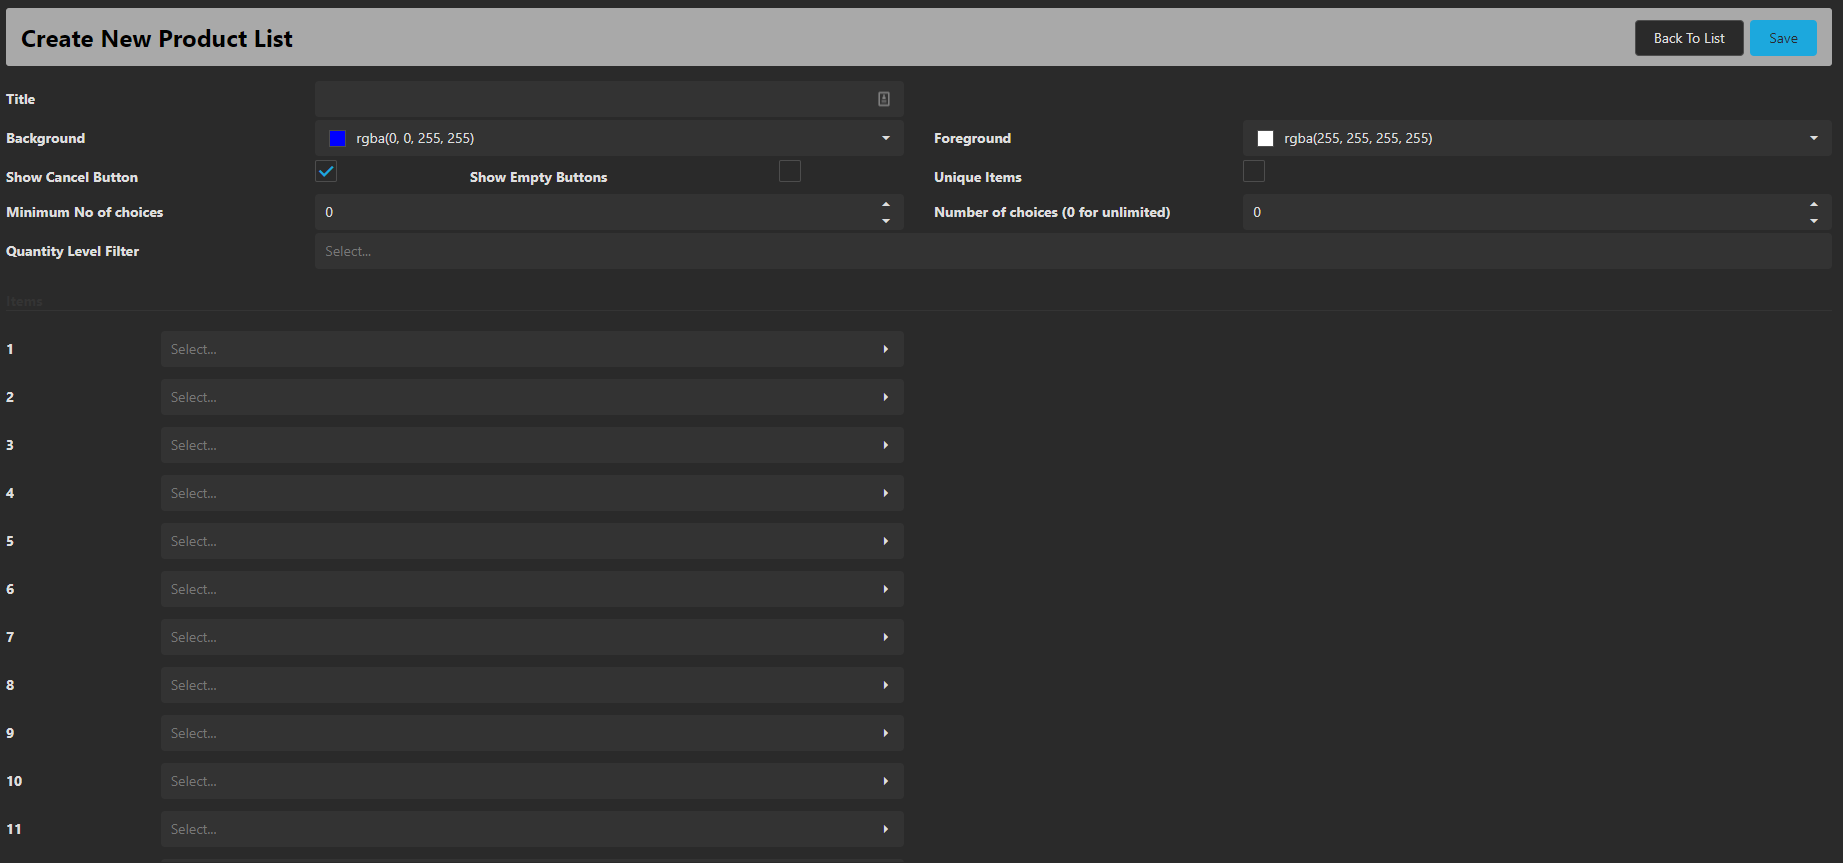
Along the top you have the following options:
Title: This is the name of the Product List, which should be set to a name relevant to what the Product List is.
Background: This is the colour the background of the products in the list.
Foreground: This will be the colour of the text of the products in the list.
Show Cancel Button: If enabled, a cancel button will be visible and usable to cancel the product list.
Show Empty Buttons: If this is enabled, and not every row has an item added, these will show as an empty button.
Unique Items: If this is enabled, any products selected in the product list can not be selected more than once.
Minimum No of Choices: If a number is set here, this is how many choices must be selected to be able to continue with selling the product.
Number of choices (0 for unlimited): If a number is set here, this will be the maximum number of choices can be made from this product list. If it set to 0 however, there is no limit.
Quantity Level Filter: This filter determines which unit sizes the product list will work for. You can choose whether it works for some sizes but not others.
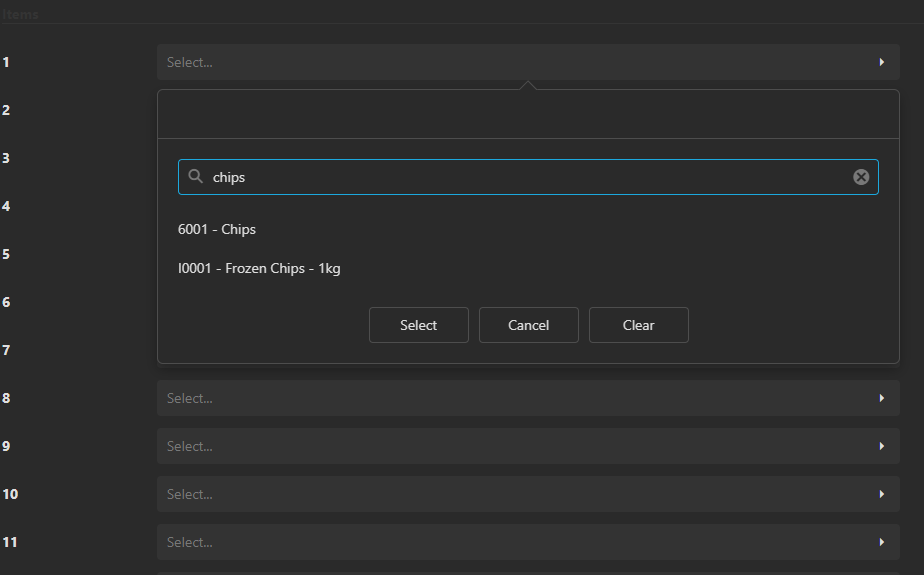
Underneath the top section is the Item selection. Here, you can choose up to 20 items to be in your product list. To do this, simply click the drop-down box next to one of the numbers, and this will open a search box where you can search for the product you wish to add. Simply select this product and then click Select
After you have added all the products you want to the product list, click the Save button at the top-right, and you should now see this in your list of Product Lists.
Memo Lists
Memo Lists are similar to Product Lists in that when a product is sold, a window will appear with some options. The difference here is that this is memo text that links (mostly used for instructional purposes) and not a product.
For example, if a customer orders a burger that comes with sauce, onions, and cheese, they may request that one of these items not be on the burger. A memo list can be setup with the the options: No Sauce, No Onion, No Cheese, etc., where one or many of these options can be pressed. This will then be attached to the product and when printed/ sent to KVS, will inform the kitchen not to add the options selected to the burger.
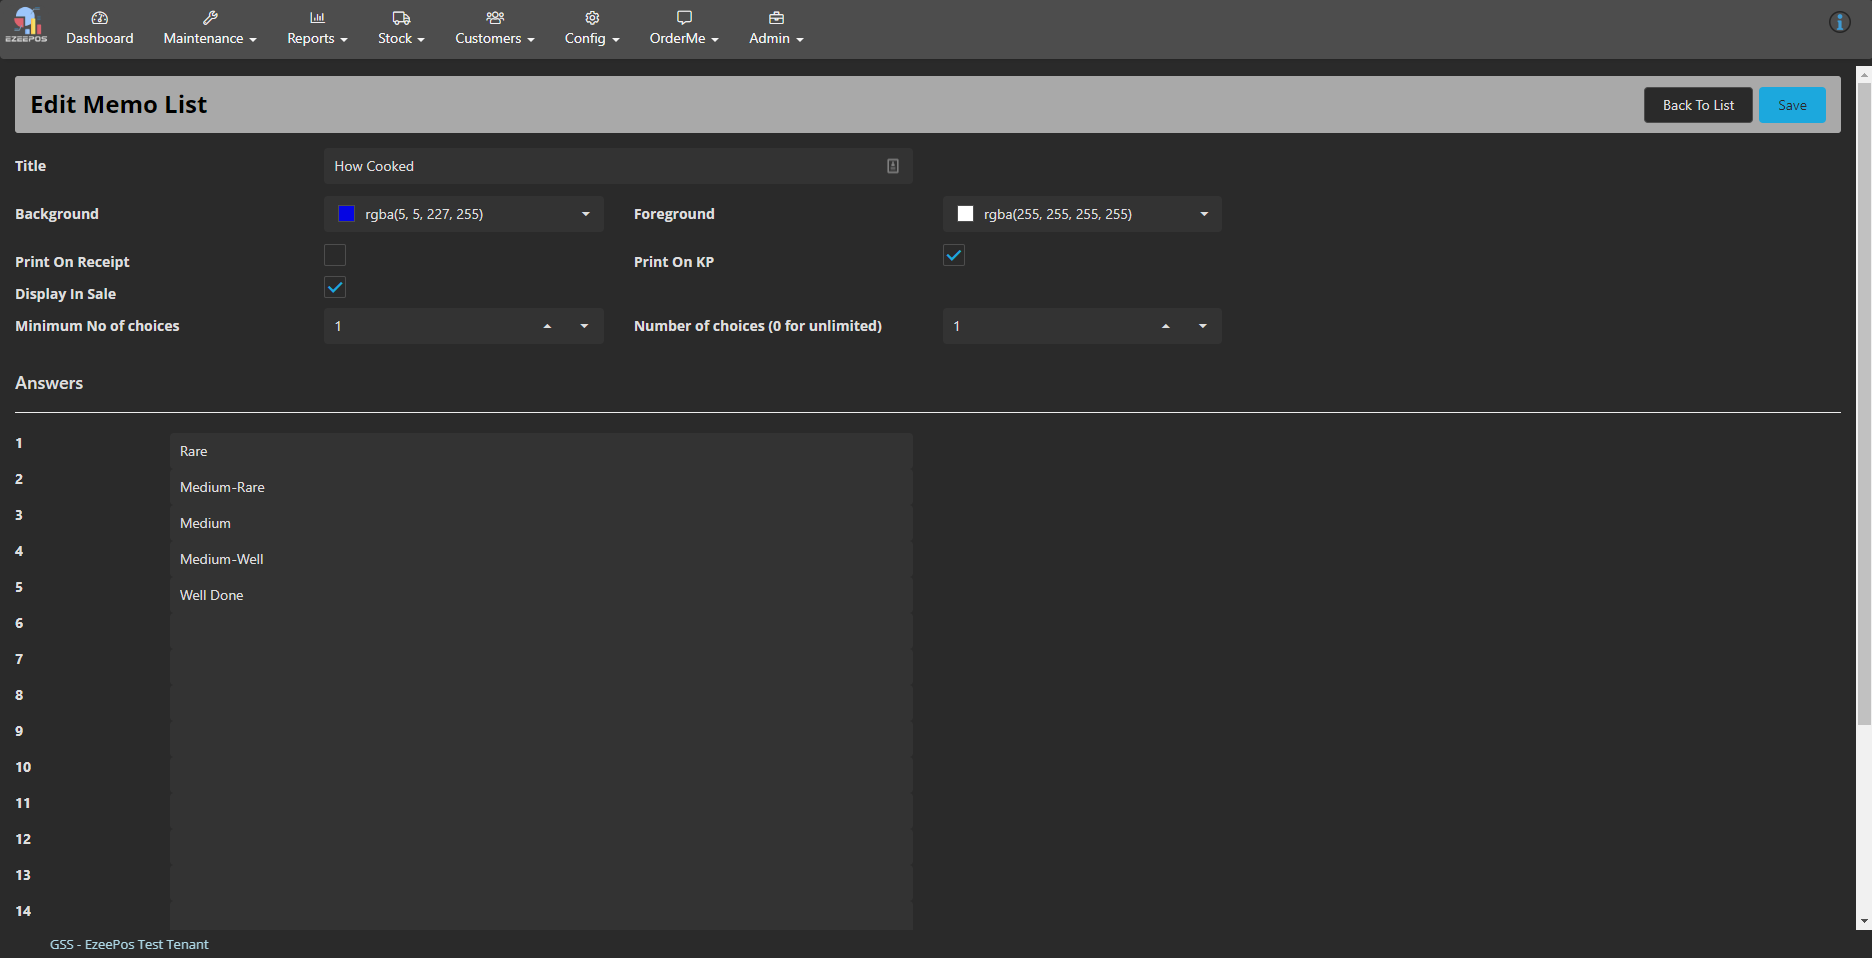
In order to set this up, you will first want to navigate to Maintenance and then Memo Lists, which will take you to the below page:

To create a new Memo List, click New List at the top-left of the page

Along the top is the following:
Title: This is the name of the Memo List, you should be set to a name relevant to what Memo List is.
Background: This is the colour the background of the products in the list.
Foreground: This will be the colour of the text of the products in the list.
Print On Receipt: If this is checked, the memo text will print on the receipt.
Print on KP: If this is checked, the memo text will print on the Kitchen Ticket.
Display In Sale: If this is checked, the memo text will display on the transaction window during a sale.
Minimum No of Choices: If a number is set here, this is how many choices must be selected to be able to continue with selling the product.
Number of choices (0 for unlimited): If a number is set here, this will be the maximum number of choices can be made from this memo list. If it set to 0 however, there is no limit.
Underneath this is where you can add your memo options. To do this, simply click on one of the text fields next to the numbers on the right and input the memo option.
Once you have added the options you need, click Save at the top right of the screen and you should now see this in your list of memos.
Once these lists have been setup, you can then link them to the product in Product Programming. If you would like help on how to do this, please refer to the following guide: Basic Setup of a Product In eZeePOS Back Office