EzeePOS is able to fire a cash drawer once a sale has been finalised. This guide will go through how to setup a cash drawer.
Before you can setup the cash drawer, you will first need to determine where the cash drawer will be firing from. At the moment, the locations from which the cash drawer can fire from are the following:
- – iMin Cash Drawer Port
- – Printer Cash Drawer Port
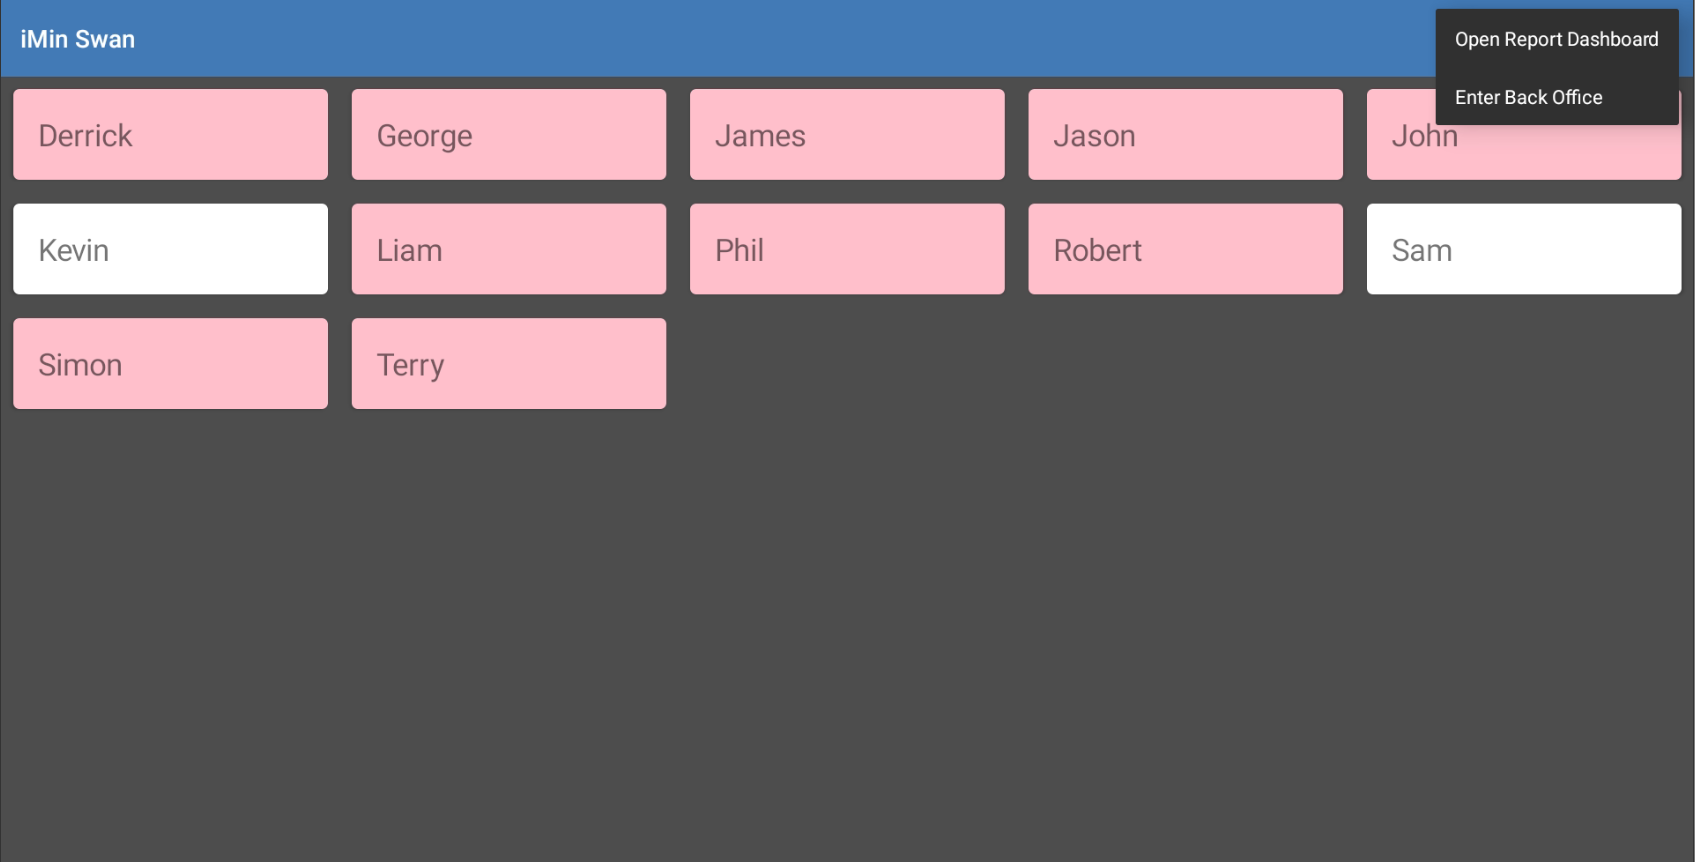
To let eZeePOS know where the cash drawer is firing from, from the employee login screen, click the three stacked dots at the top right of the screen and press the option [Enter Back Office]. This will ask for a password, which is what will have been set in the Cloud Back Office. Enter this and then press OK.
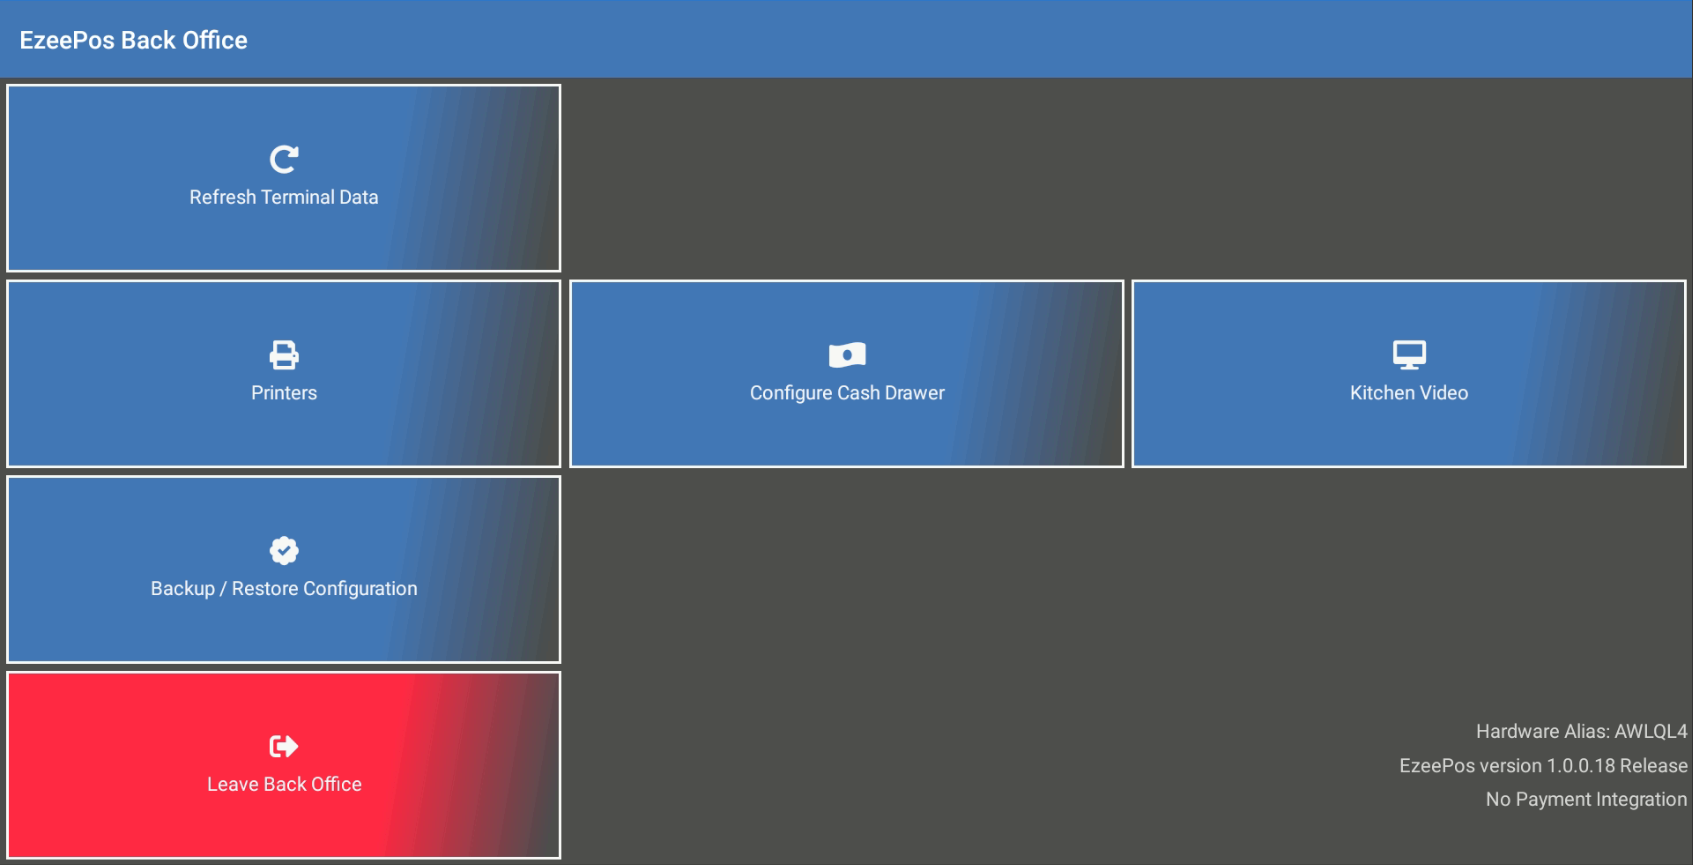
You will now be in the EzeePOS Back Office. From the list of options, press the one which says [CONFIGURE CASH DRAWER].
You will now be in the cash drawer configuration menu. At the top there is the Driver setting, tap the field underneath this and you will be given a list of options. Choose the device that you will be using. If you choose the iMin D4 Cash Drawer option, all you will need to do now is press [Test Kick] and as long as you have the cash drawer plugged into the iMin D4, it should fire.
If however you choose the Printer Cash Drawer option, there will be a new field underneath the Driver option, which is the Printer field. This allows for you to choose which printer the cash drawer is connected to. You will first need to have setup a printer in the back office in order for the device to appear.
If you need help on how to setup a printer, please click here to go to the Connecting a printer to eZeePOS guide.
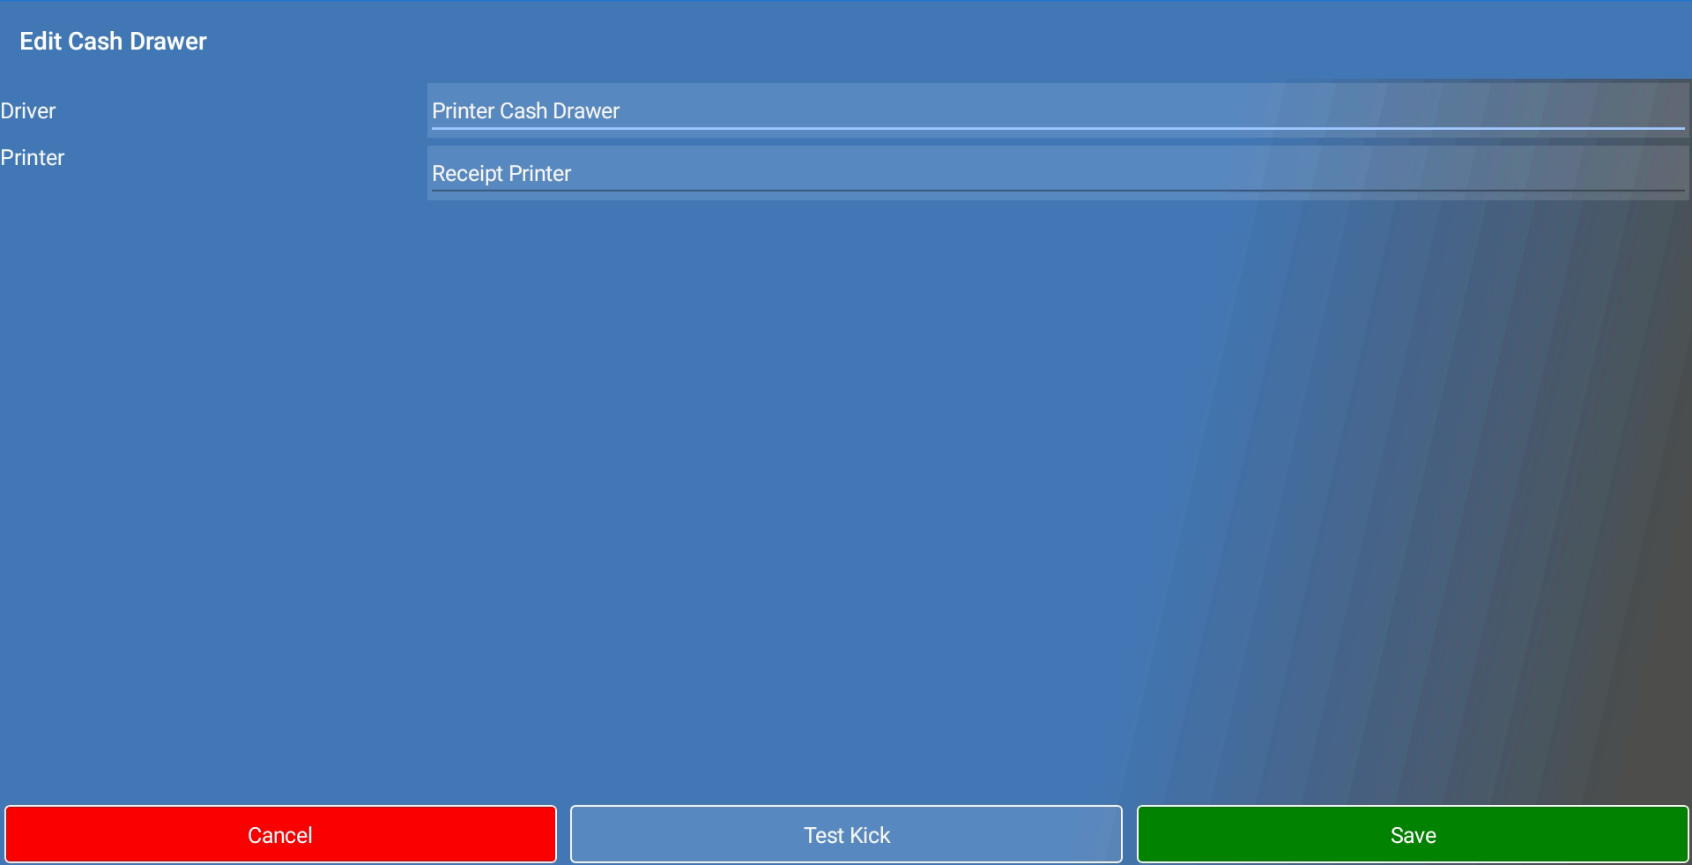
Once you have selected which printer the cash drawer is connected to, press [Tesr Kick] and as long as the cash drawer is plugged into the printer, the cash drawer should fire. If it does not fire at this point, it may be an issue with the drawer itself, or the device it is connecting to. Always double check that the cable is plugged into the port correctly and the voltage of the drawer is correct for the device it is being plugged into. If you are happy with these settings, click [Save] and then [Leave Back Office] on the following screen.
You should have now successfully have setup a cash drawer with eZeePOS, and when finalising a sale, the drawer should now fire.