EzeePOS can link with a printer to allow for receipt and kitchen tickets to be printed. This can be setup within the eZeePOS app itself.
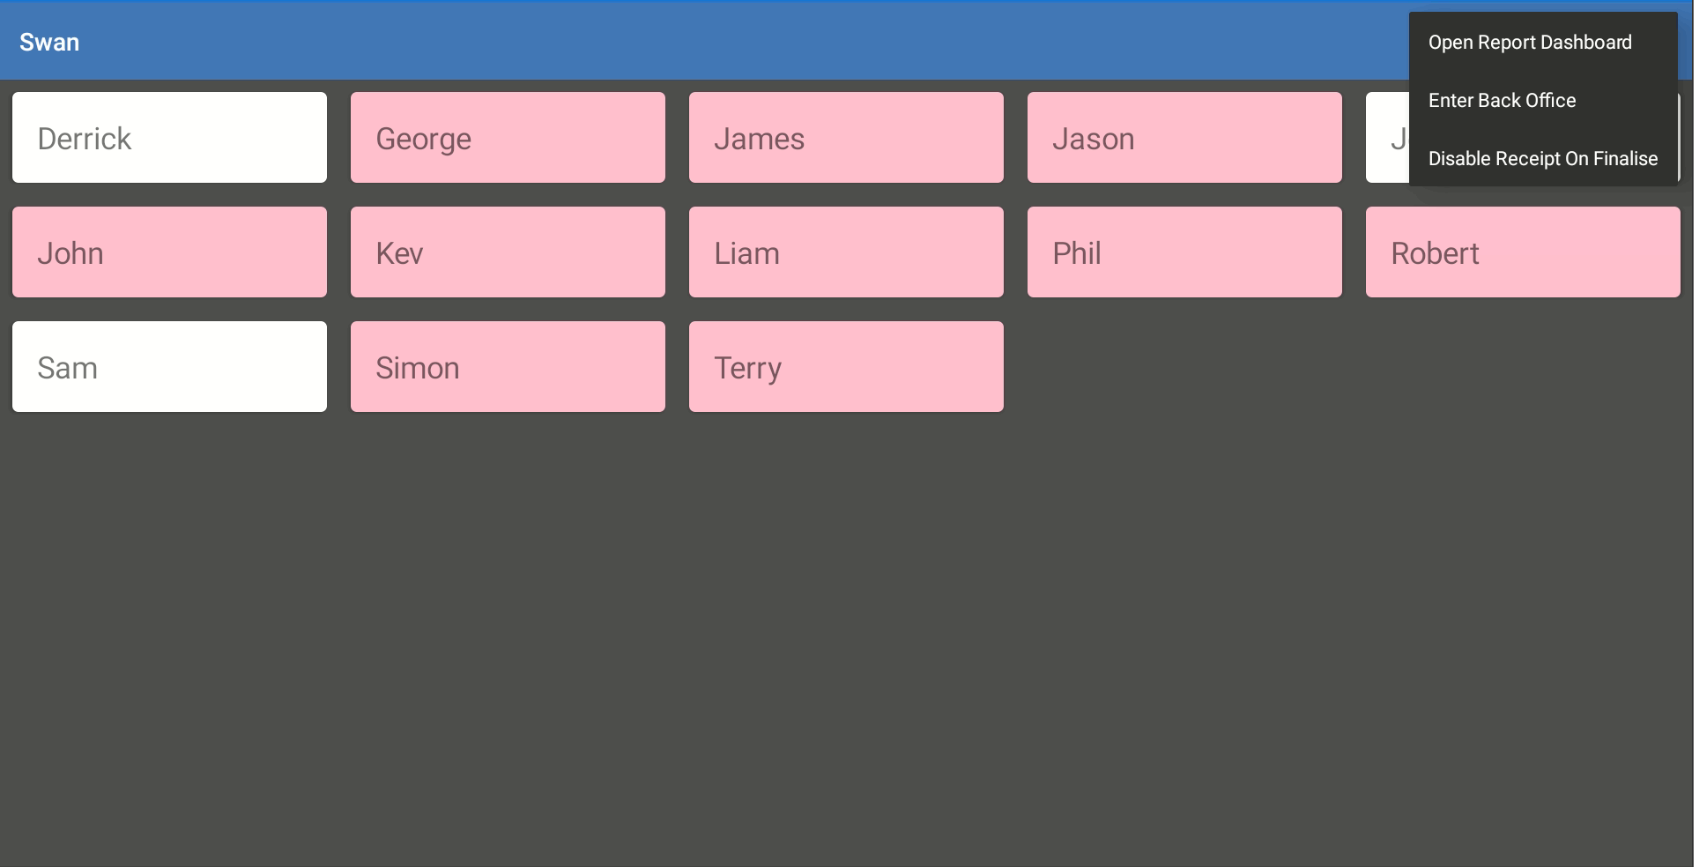
To setup a printer, on the employee login screen, press the 3 stacked dots at the top right of the screen and press [Enter Back Office]. This will ask you for the Back Office Password. This password will have been set in the eZeePOS Cloud Back Office, enter this and then press OK.
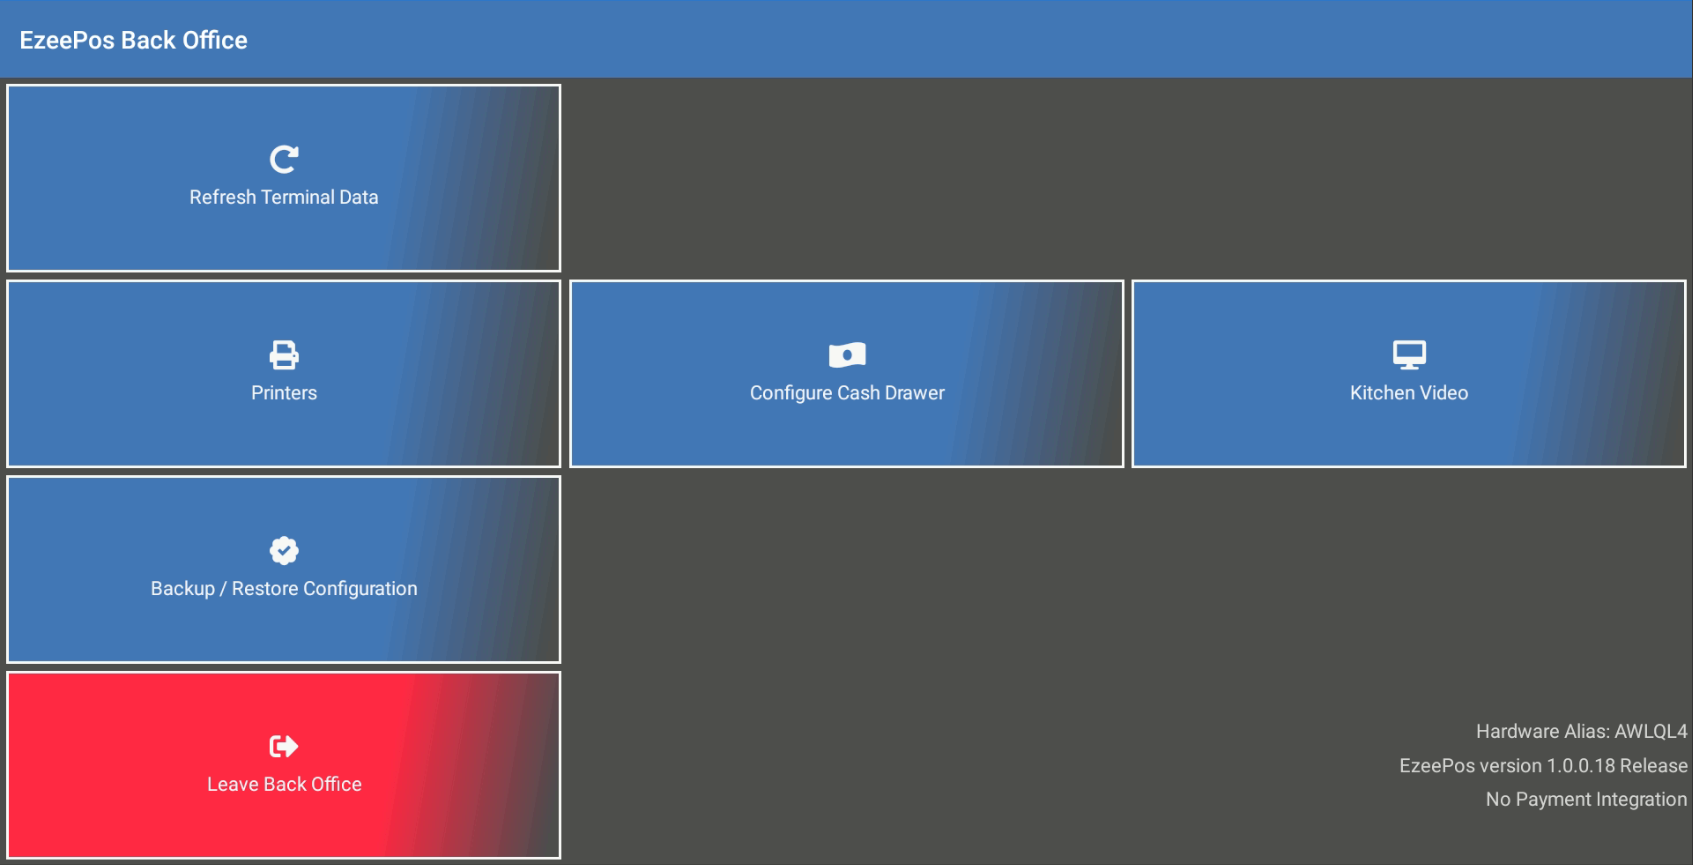
On the next screen, select the option which says [Printers].
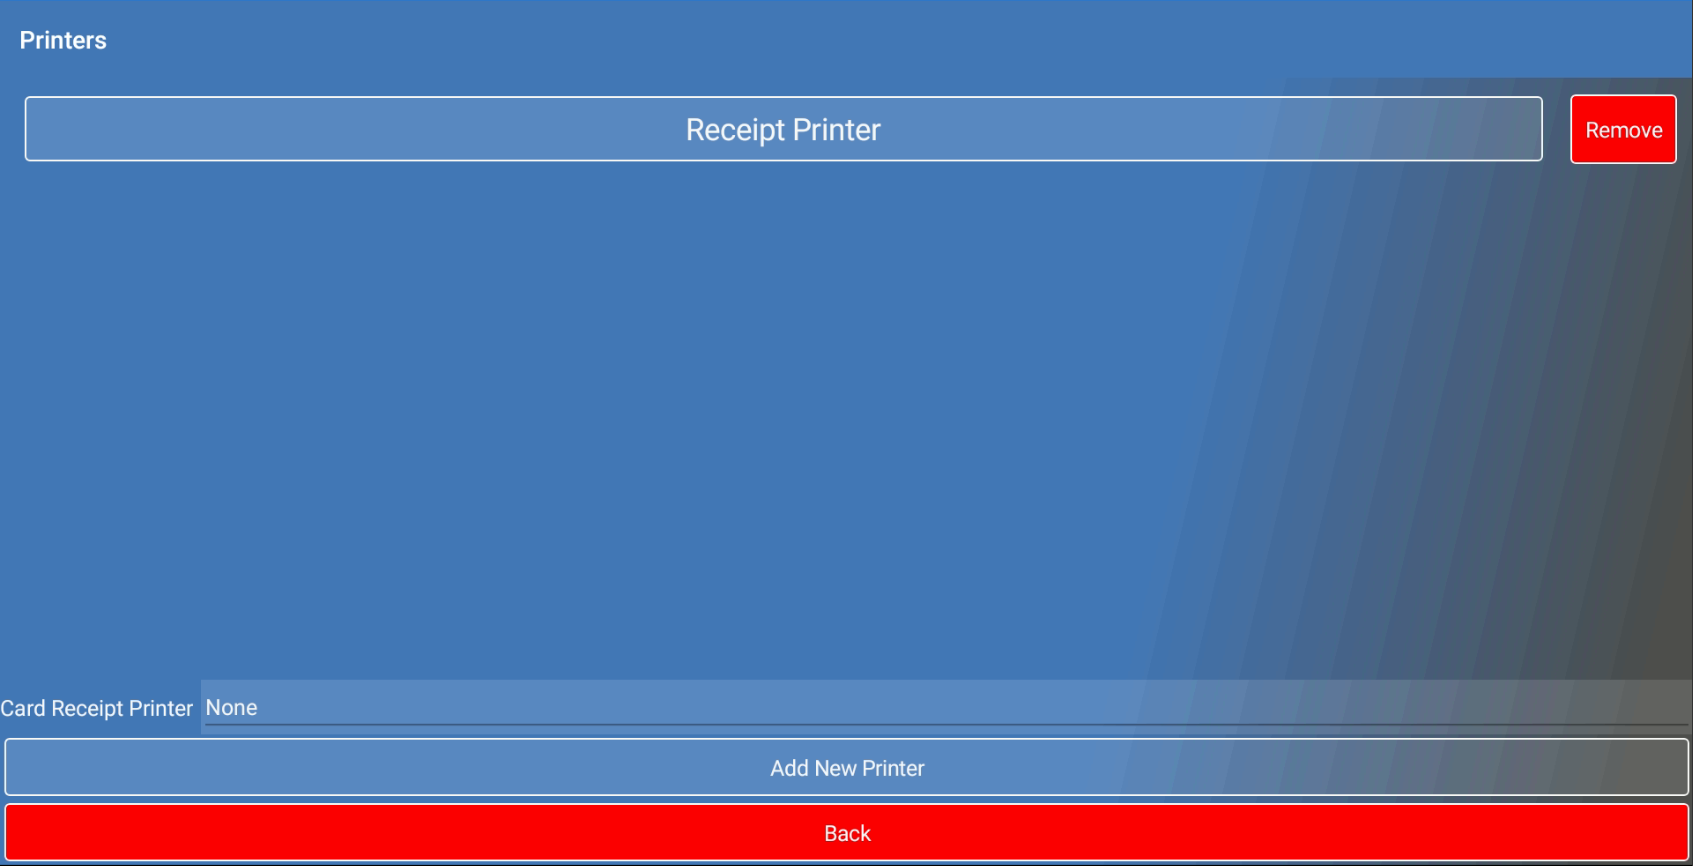
On this screen, click the [ADD NEW] button at the bottom of the screen.
You will now see a list of settings for the printer. The first option is the Printer Name. Press the blank text box and this will open up a keyboard, use this to name your printer. For example, Receipt Printer.

Underneath this you will have the Driver option. This determines what type of printer is being connected. The options currently available are:
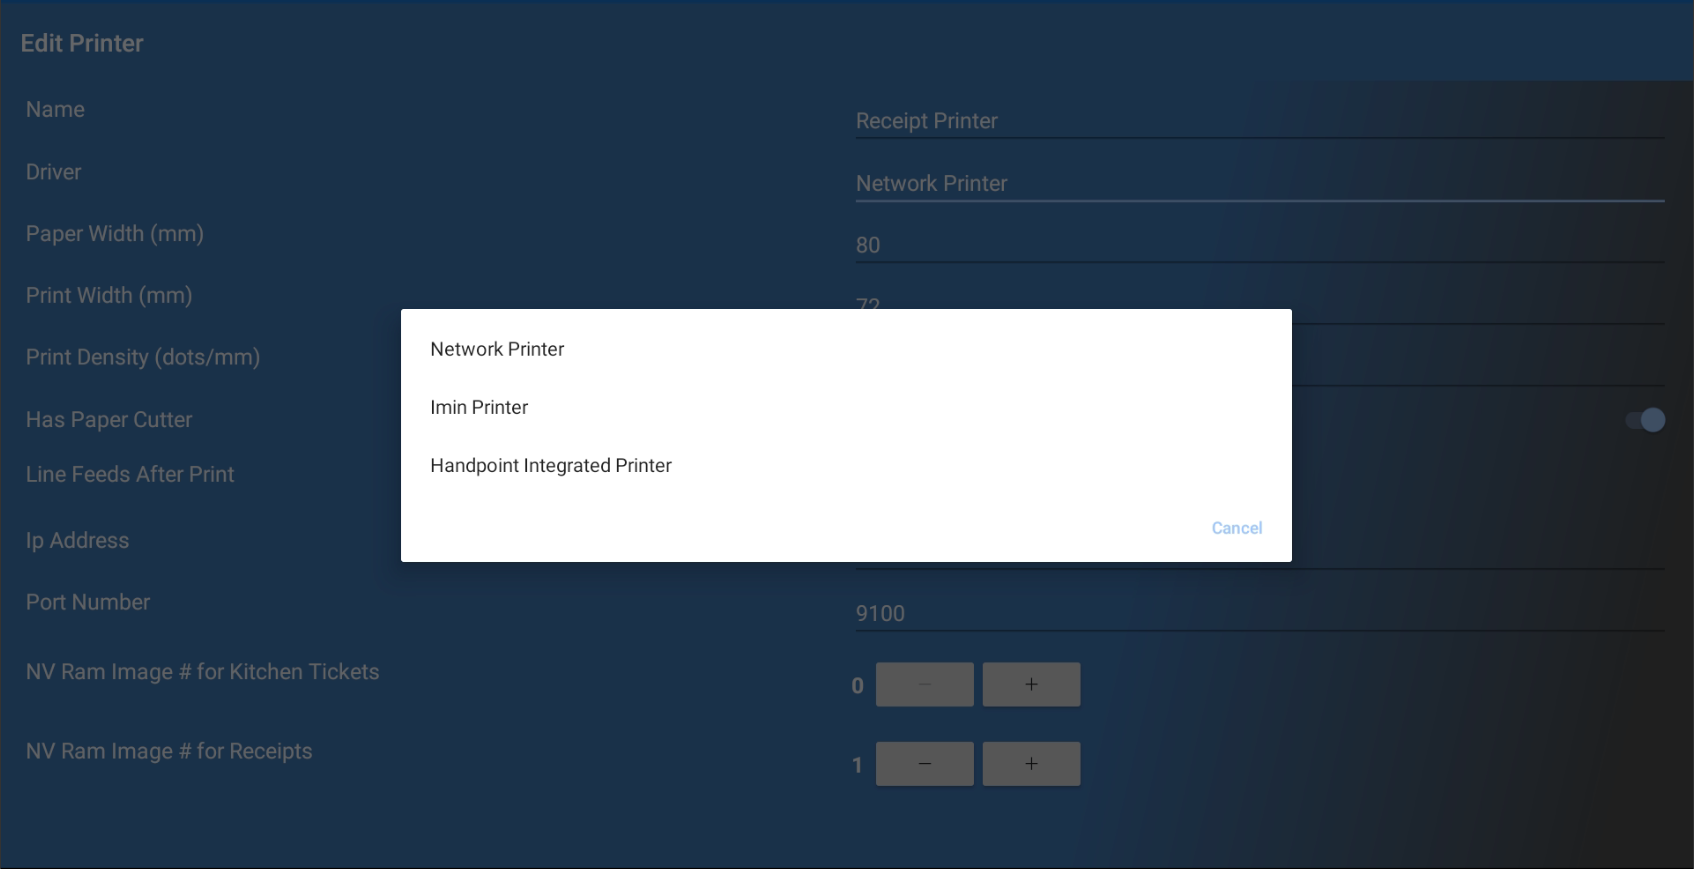
- – Network Printer (this will cover a number of different printers)
- – iMin Printer (This covers the iMin devices USB and SPI printers)
- – Handpoint Integrated Printer (for the PAX A920 and PAX A80 Handpoint devices)
After you have selected the correct Printer Driver, underneath is the Paper Width (mm), Print Width (mm), and Print Density (dots/mm) fields. Depending on the printer and roll used you will want to change these settings to match. Selecting one of these will open a dialog box with a list of different sizes.
You may need to try a few different sizes until you find the one most appropriate for the printer being used.

There is now the option Has Paper Cutter. Some printers will have an internal paper cutter that cuts the paper once it has finished printing. If you wish for this to be turned on, you will want to set the option switch to the right.

The next option below this will change depending on what printer driver has been selected. If you have Network Driver selected above, the two options below will be IP Address and Port Number.
If it is a network printer, the first thing you will need to do before is ensure that an IP has been set on the printer (make sure that it is in the same range and connected to the network the EzeePOS device is in) and check what port number it is using (many printers will use port 9100).
To enter an IP, tap the text box underneath the IP Address label and this will open a keyboard to allow you to enter this.

On the other hand, if you have selected the iMin Printer as the printer driver, the option here will instead say Connection Mode. Pressing this will give you two options, USB and SPI. You will need to choose one of these, but this depends on the device you are using.
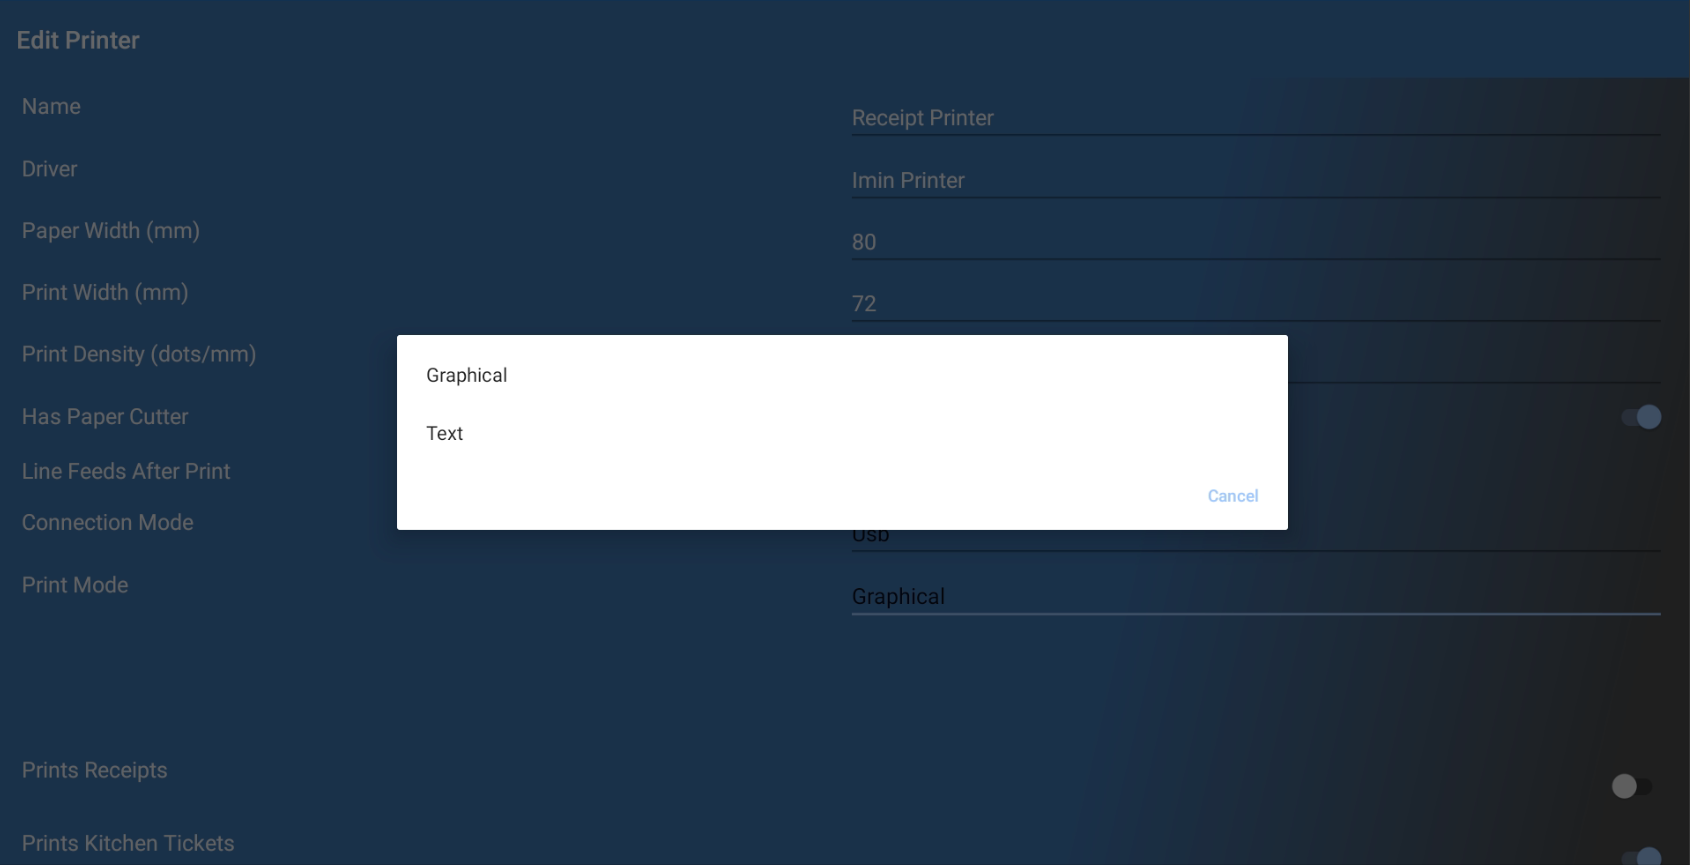
The two iMin devices that use SPI printing are the iMin M2-202 and the M2-Pro. The majority of the others will use USB. There will also be an option here for the Print Mode, and when pressed you will have the option of Graphical or Text. This is down to preference however as default this is set to Graphical.
If a Network Printer is selected, the penultimate two options will be for which NV Ram Image number to use. An NV Ram image is an image that is stored internally in the printer. This is normally added via the printer’s utility or via the NV RAM Tool. As you can save more than one image on a printer, this section allows you to choose which NV Ram image to use.

The final two options for the printer are whether it will be set to be a receipt printer and/ or a kitchen printer. To enable either, simply set the switches on the right-hand side to on.

Once you are happy with these settings, click [SAVE] and the printer should now appear in the list of printers. You should now be able to return to Register Mode, and depending on what role you have given the printer, it should print either a receipt or kitchen ticket.